Integrations
Prerequisites
Before setting up integrations, make sure you have an understanding of
Hubspot Integration
Configuring the Navattic form
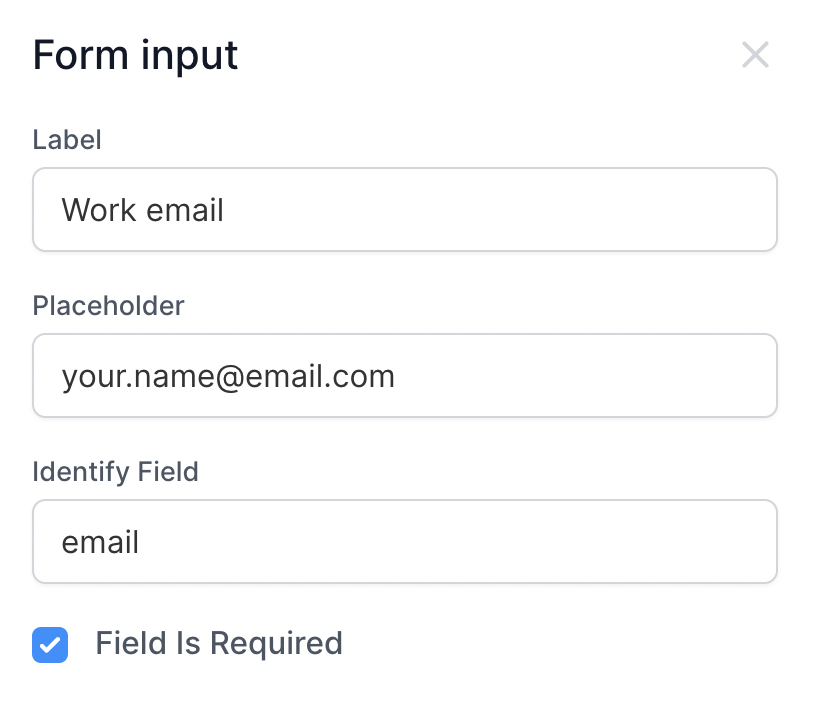
Navattic uses "Identify Field" in the form to determine which Hubspot property to sync. To ensure that Hubspot contact properties are properly synced with form fields from Navattic, you must use these values for "Identify Field":
email- (required) the contact's e-mail addressname- (optional) the contact's full namephone- (optional) the contact's phone number
Example setup of an e-mail form field in Navattic:
Saving Hubspot API Key
First, obtain your Hubspot API key by following the instructions here.
Back in app.navattic.com, go to Settings > Integrations > Hubspot. in the "Setup" tab, paste your Hubspot API key in the box.
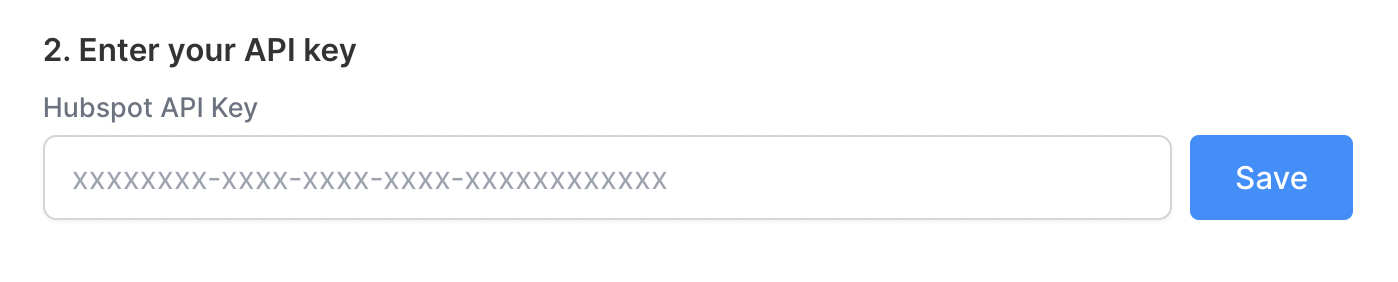
Hit "Save", and Navattic will verify that the API key is valid.
Connecting Projects
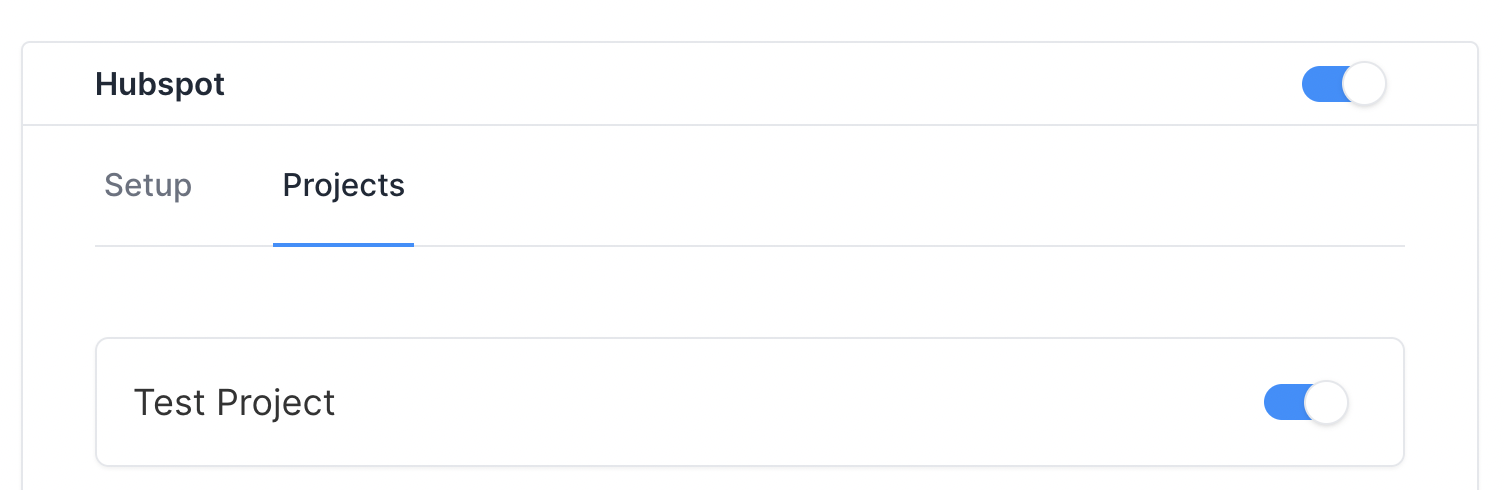
Once your API Key has been saved successfully, you may activate the integration for specific projects. The projects must contain a form with the required fields indicated above.
To activate one or more projects, go to the "Projects" tab within the integration. Use the toggle switch to activate or deactivate the integration.
Navattic in Hubspot
Navattic will sync email, first/last name, and phone number (if available) into Hubspot's default Contact properties. Additional properties will be created under the "Navattic" property group:
| Field | Description | Example Value |
|---|---|---|
| Current Url | URL where the lead was identified | /ckzoa8vej108582hfuywfds95i0?g=ckzoa8alm108086hfuywxykpilm&s=0 |
| Flow ID | Navattic-specific ID for the flow | ckzoa8alm108086hfuywxykpilm |
| Flow Name | Name of the flow | Sample flow |
| Name | Full name of the lead | Johnny Appleseed |
| Project ID | Navattic-specific ID for the project | ckzoa8vej108582hfuywfds95i0 |
| Project Name | Name of the project | Sample project |
| Session ID | Navattic-specific identifier for the user's session | cl0b5wy6o00003f61kzfy06ys |
Salesforce Integration
Connecting to Salesforce
First, find your Salesforce Domain. Here is an article from Salesforce on how to find your Domain details. Next, connect to Salesforce using that Domain (ignore the Domain Suffix e.g., .my.salesforce.com).
You will then be prompted to give your Salesforce access to Navattic. Accept Navattic and then you will be brought to your Salesforce account.
Configuration Instructions
View an interactive demo of the Navattic Salesforce integration.
First, choose to sync with either Leads or Contacts. Then, choose what customer data you want to send. Indicate if you want to:
- Create new Salesforce Leads from Navattic customers - this will only create new leads or contacts and send demo engagement data, even if the lead already exists in your Salesforce account
- Update existing Salesforce Leads from Navattic customers - this will send new leads and update any existing leads or contacts in your Salesforce with demo engagement data instead of creating a new lead or contact.
Choose which custom fields from your form you want to map to Salesforce. The default fields are:
- navattic.customer.name ⇒ salesforce.lead.Name
- navattic.customer.email ⇒ salesforce.lead.Email
- navattic.customer.phone ⇒ salesforce.lead.Phone
- navattic.customer.position ⇒ salesforce.lead.Title
- navattic.customer.company ⇒ salesforce.lead.Company
These fields must exist on your Project form in order to map them. These fields must also have the associated name (e.g., “phone” or “company”) in the Identify Field on the Navattic form. If you try to map a field that does not exist on your form, then you will get an error message.
The following fields will be created if you choose to push engagement data:
| Field | Description | Example Value |
|--------------|-----------------------------------------------------|----------------------------------------------------------------|
| Last Viewed Flow ID | Navattic-specific ID for the last viewed flow |
ckzoa8alm108086hfuywxykpilm | | Last Viewed Flow Title | Name of the
last-viewed flow | Sample flow | | Last Viewed Flow Step Title | Title of most
recently viewed Navattic step | Dashboard overview | | Last Viewed Flow Step
Number | Number of the most recently viewed step | 6 | | Last Viewed Project ID
| Navattic-specific ID for the last viewed project |
ckzoa8vej108582hfuywfds95i0 | | Last Viewed Project Title | Name of the
project | Sample project | | Session ID | Navattic-specific identifier for the
user's session | cl0b5wy6o00003f61kzfy06ys
Choose what Lead or Contact layout you want to apply the Navattic Customer Engagement data to. Our integration will pull in all of your lead and contact layouts to select from.
Edit layout access permissions. Choose what permissions have access to this lead or contact layout with Navattic data. Note: by default, all profiles will be selected and will have access.
Connecting Projects
Lastly, connect a project(s) to the integration. Choose what projects you want to be enabled with this integration. Select the check next to the project name to connect it to Salesforce. If this project does not have a Navattic form you will get an error message. Make sure the project selected has a Navattic form with the correct fields selected.
Marketo Integration
Setting up your Marketo instance
Navattic requires a Client ID, Client Secret, Endpoint URL, and Identity URL from your Marketo instance. If you have not set up similar integrations before, the below step-by-step guide will help you create a custom service that Navattic can harness.
- Create an API-only user role
- Create an API-only user
- Create a custom service
- Grab your Client ID and Client Secret
- Grab your Endpoint URL and Identity URL
Once you've obtained your Client ID, Client Secret, Endpoint URL, and Identity URL, input them into their respective fields and hit "Save".
Custom fields on Marketo leads
The following fields will be created on Marketo leads if you choose to push engagement data:
| Field | Description | Example Value |
|--------------|-----------------------------------------------------|----------------------------------------------------------------|
| Last Viewed Flow ID | Navattic-specific ID for the last viewed flow |
ckzoa8alm108086hfuywxykpilm | | Last Viewed Flow Title | Name of the
last-viewed flow | Sample flow | | Last Viewed Flow Step Title | Title of most
recently viewed Navattic step | Dashboard overview | | Last Viewed Flow Step
Number | Number of the most recently viewed step | 6 | | Last Viewed Project ID
| Navattic-specific ID for the last viewed project |
ckzoa8vej108582hfuywfds95i0 | | Last Viewed Project Title | Name of the
project | Sample project | ### Connecting Projects
Once your configuration has been saved successfully, you may activate the Marketo integration for specific projects.
To activate one or more projects, go to the "Projects" tab within the integration. Use the toggle switch to activate or deactivate the integration.
Google Analytics Integration
Saving GA Universal Tracking ID
First, obtain your Google Analytics Universal Tracking ID by following the instructions here.
Back in app.navattic.com, go to Settings > Integrations > Google Analytics. in the "Setup" tab, paste your UA Tracking ID in the box.
Connecting Projects
Once your UA Tracking ID has been saved successfully, you may activate the integration for specific projects.
To activate one or more projects, go to the "Projects" tab within the integration. Use the toggle switch to activate or deactivate the integration.
Segment Integration
Saving HTTP API Key
First, obtain your HTTP API write key from Segment by following the instructions here.
Back in app.navattic.com, go to Settings > Integrations > Segment. in the "Setup" tab, paste your UA Tracking ID in the box.
Connecting Projects
Once your API write key has been saved successfully, you may activate the integration for specific projects.
To activate one or more projects, go to the "Projects" tab within the integration. Use the toggle switch to activate or deactivate the integration.
Zapier Integration
Zapier provides teams with a no-code solution to quickly build, test, and automated the integrations they need to pass data from Navattic to over 3,000 third-party apps.
Navattic Zapier Integration Link Invitation
First, click this activation link to access the Navattic Zapier invitation and select "Accept Invite & Build a Zap" to start building.
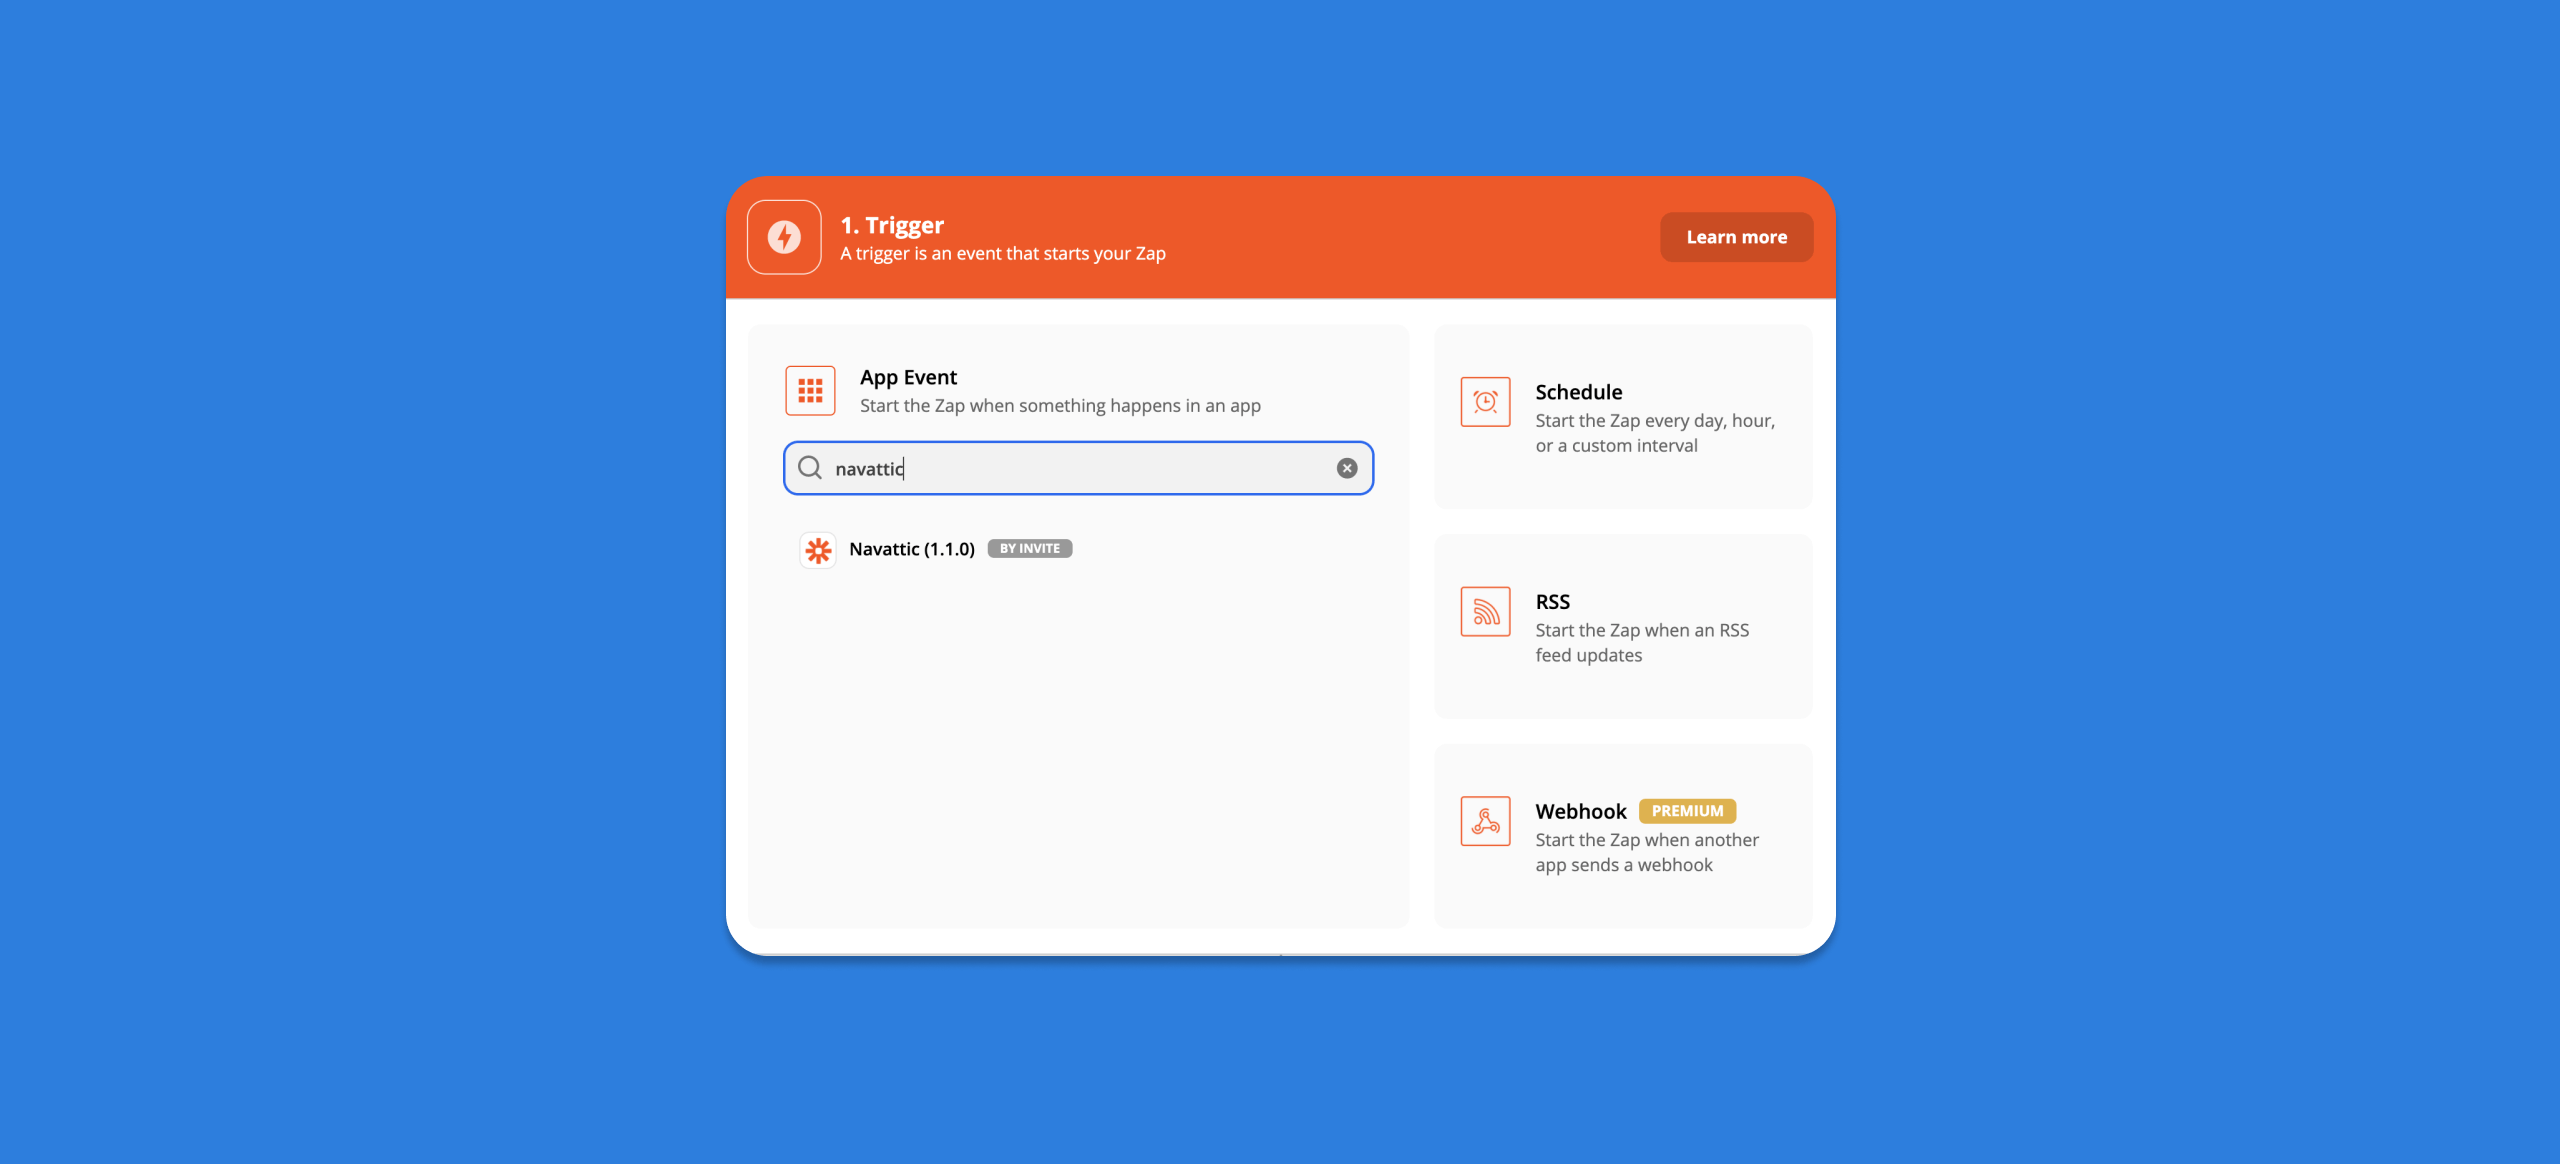
Creating a New Zap
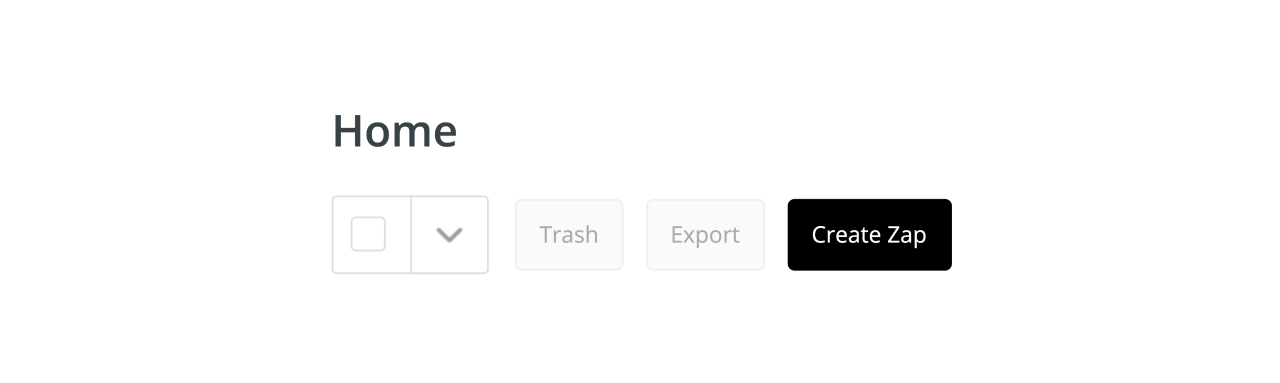
Once you have logged in to your Zapier account (create a new Zapier account) and accepted the invitation, create a new Zap from your Zapier dashboard.
Search for the Navattic trigger in the search bar.
Creating a Trigger Event
Select from the following trigger events to start the Zap action:
- Identify user event: when a user is identified
- Converted user event: when a user is marked as converted
- Complete flow user event: when a user completes a flow
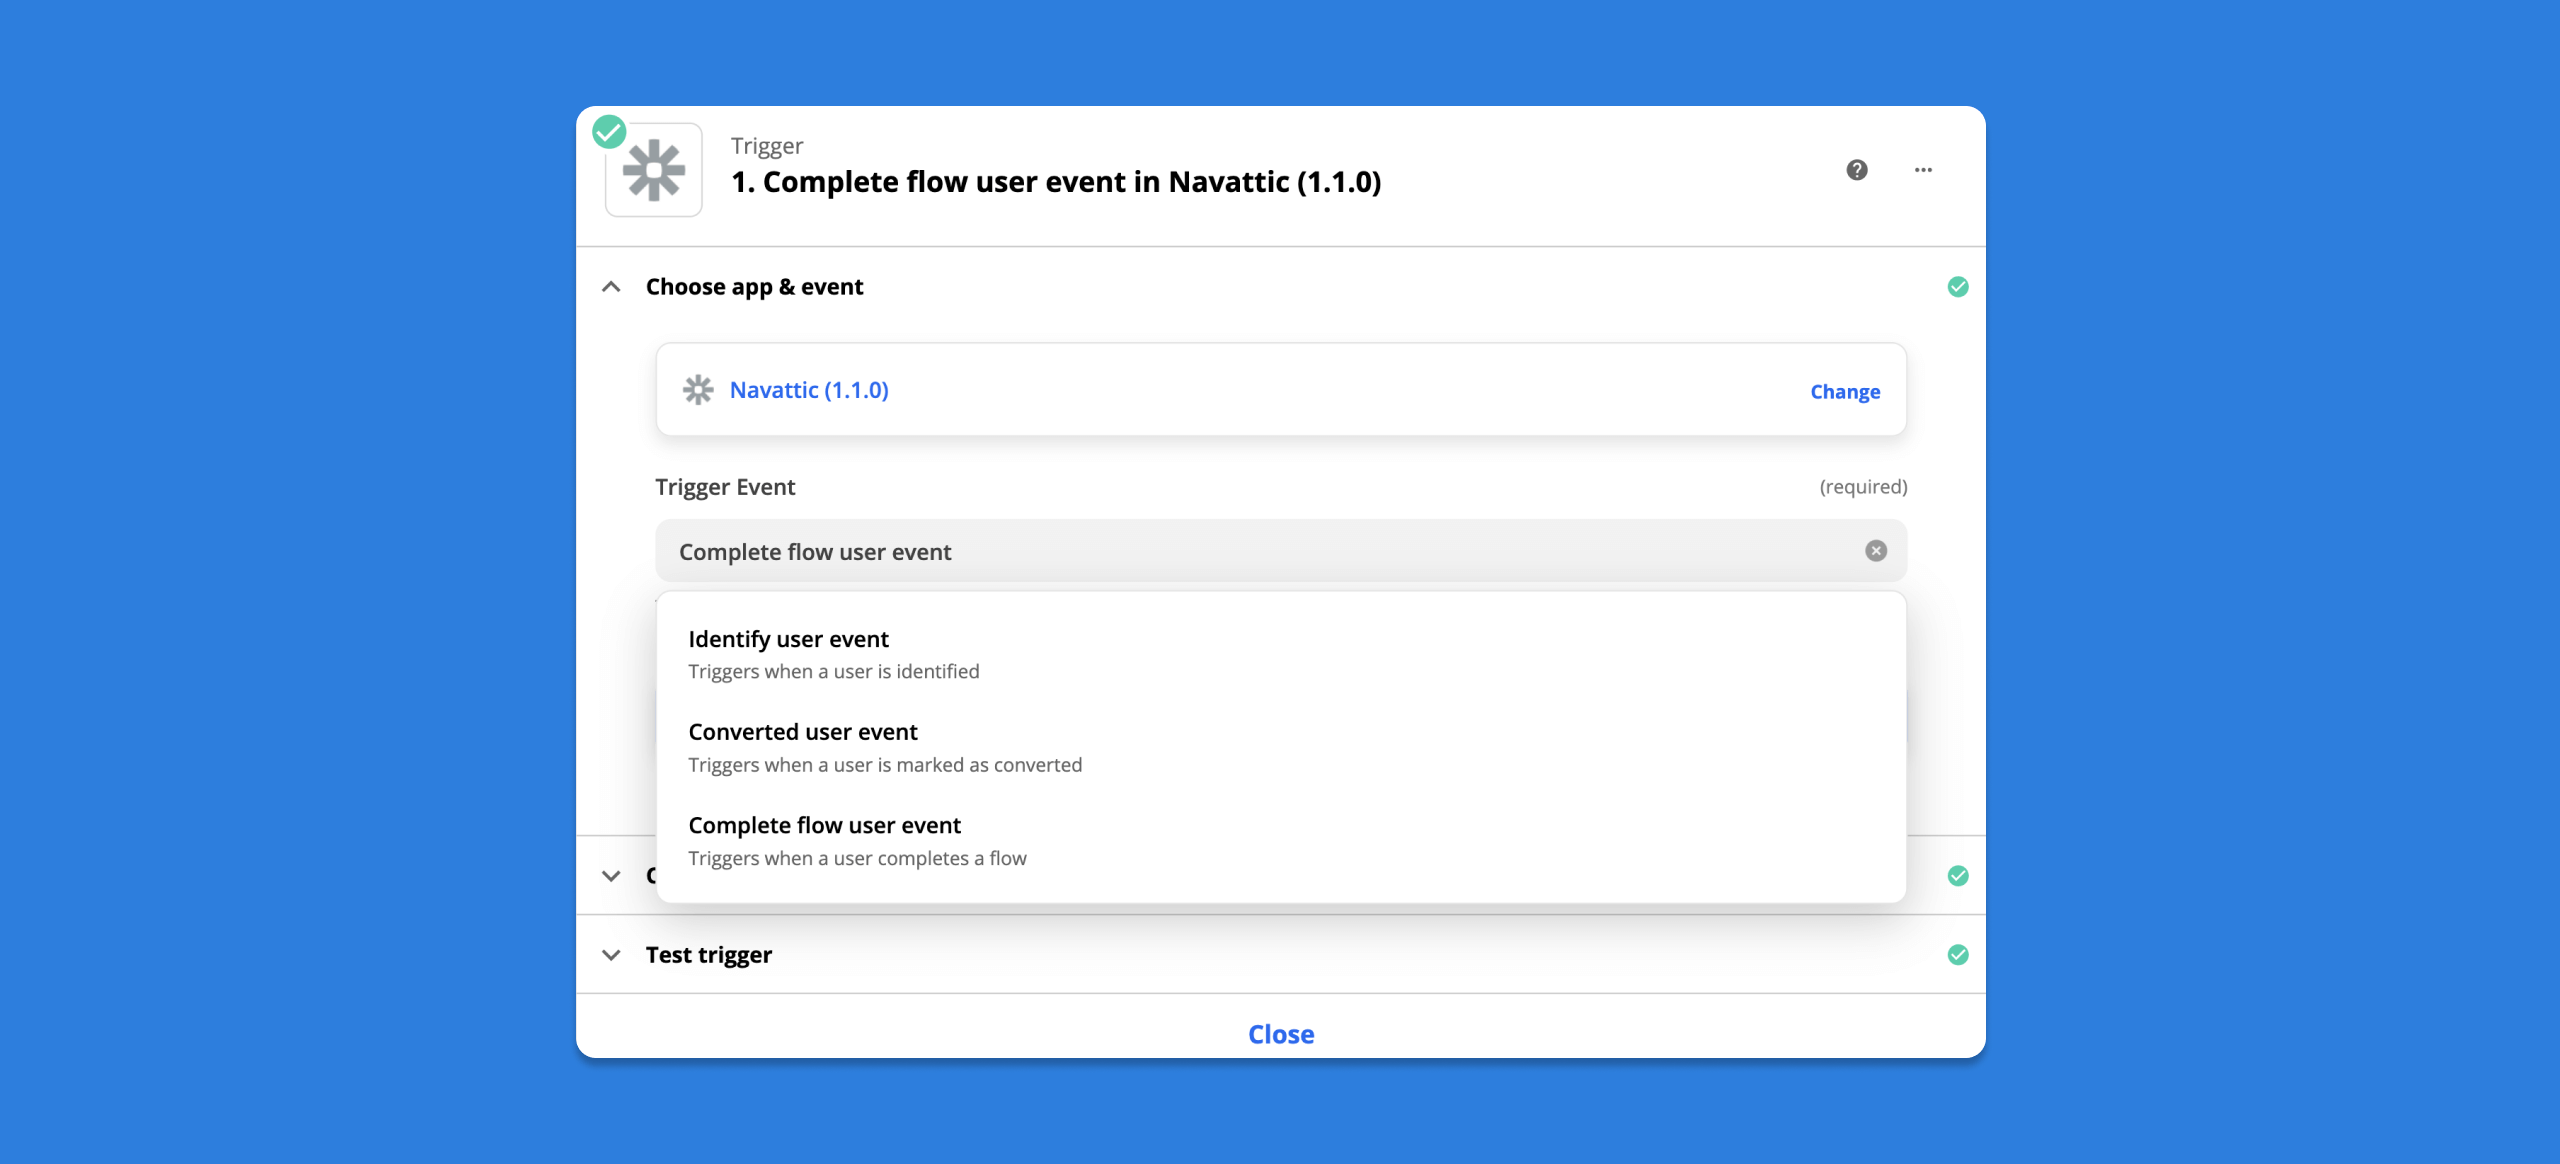
This trigger event will run on a time interval based on your Zapier plan (the default is 15 minutes).
Creating an API Key
Navigate to the Account Settings page in your Navattic workspace.
Generate a new API key with the "+ Generate API key" button and give it the title Zapier Key
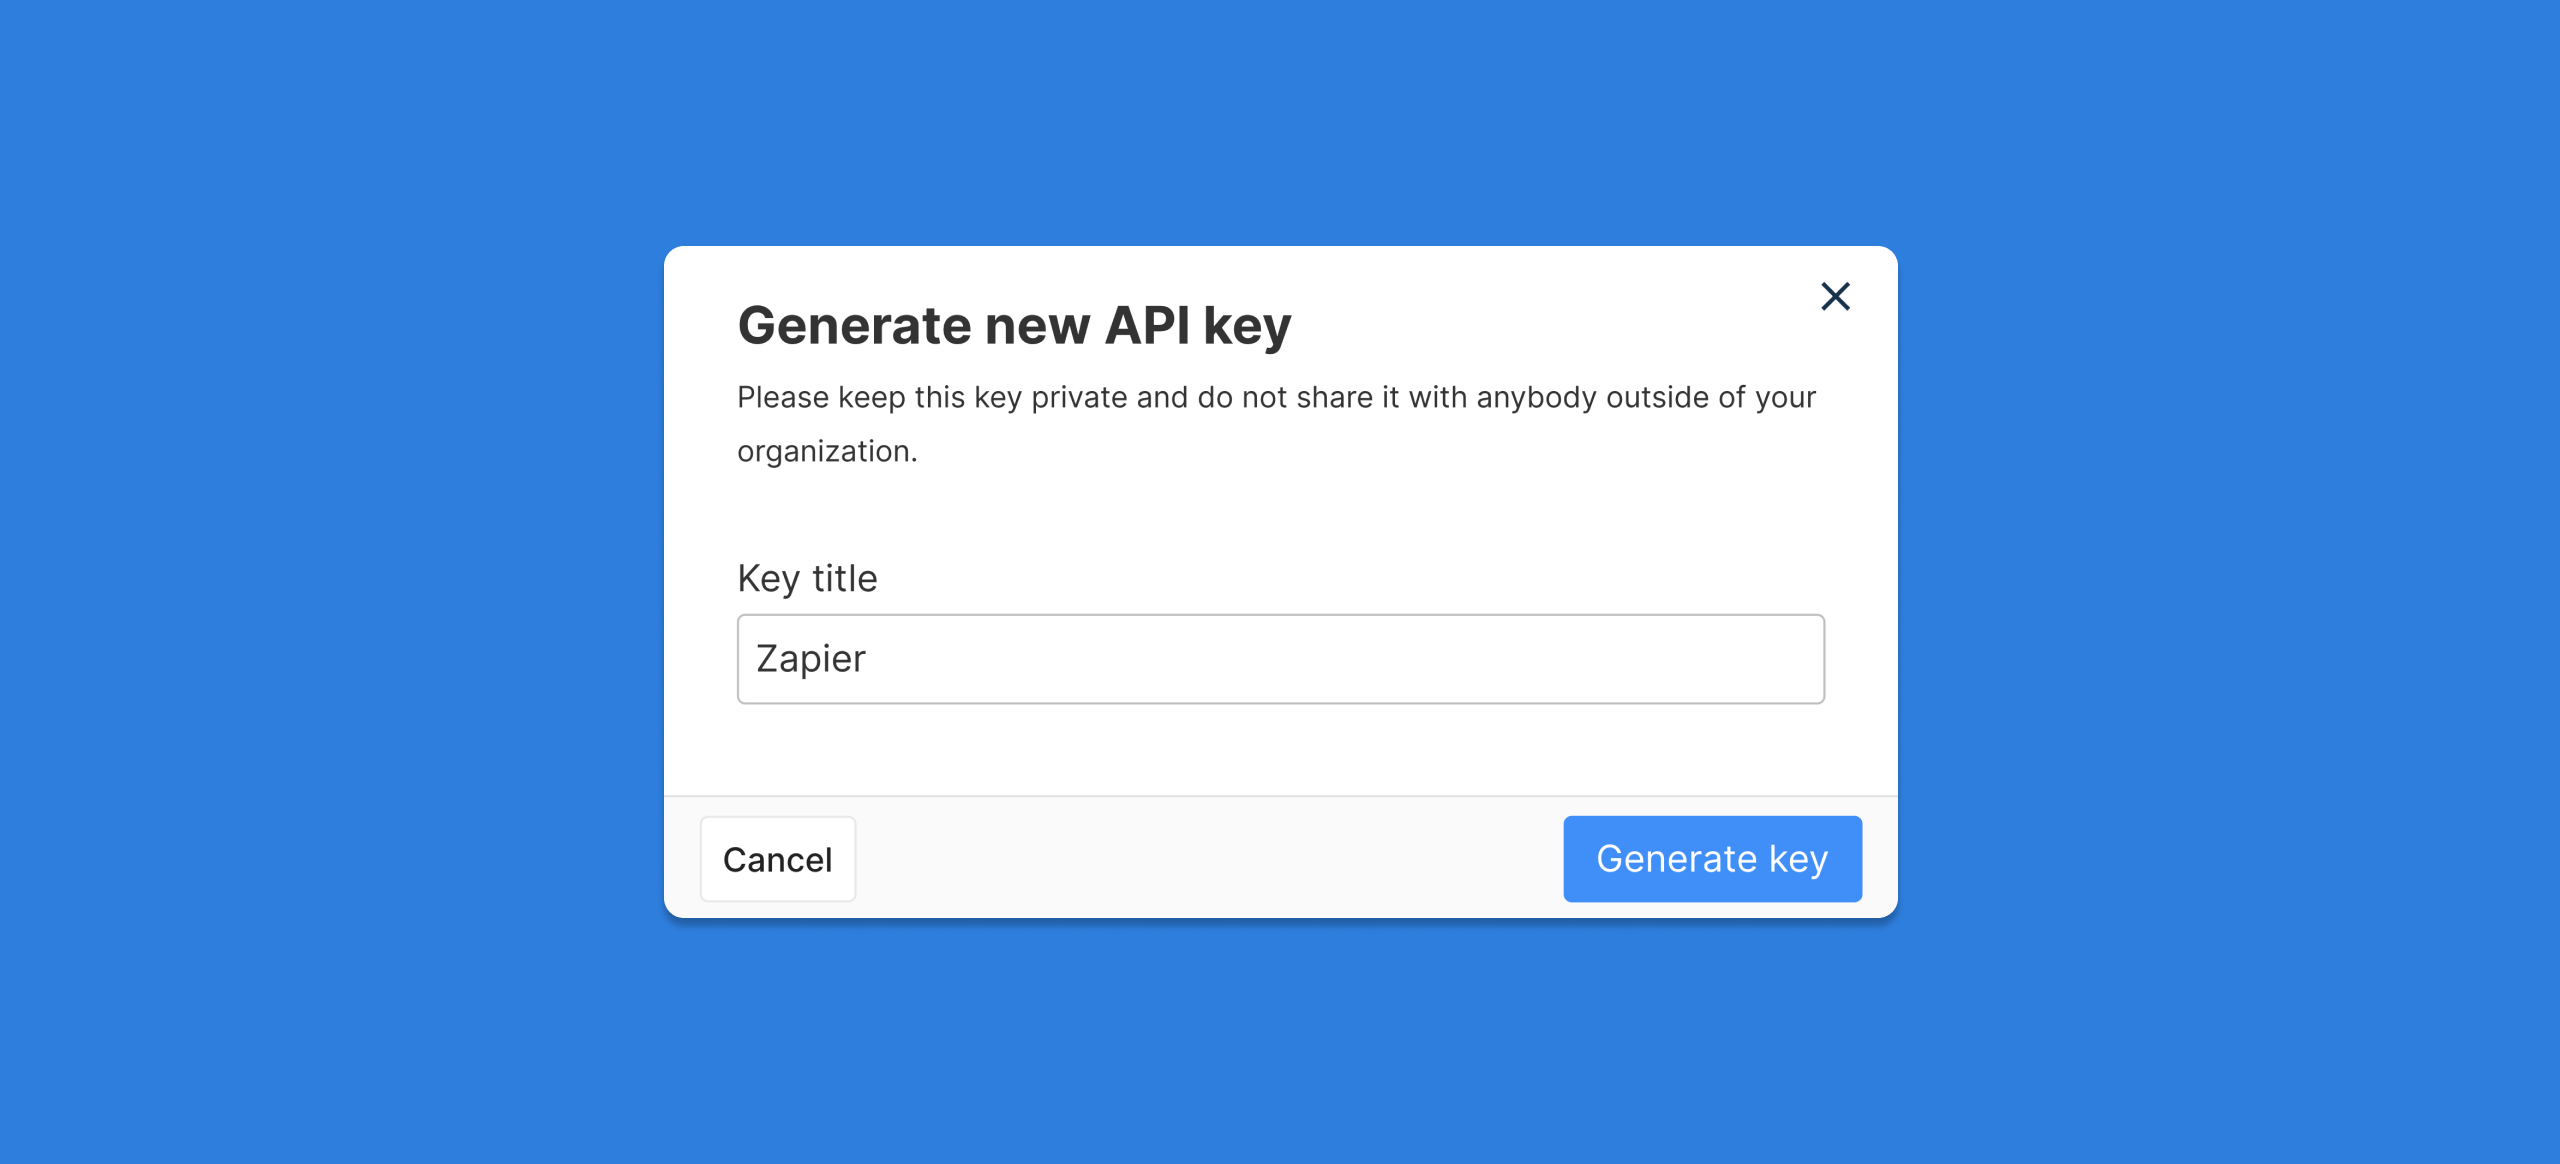
You can then store, view, copy, and delete your API keys.
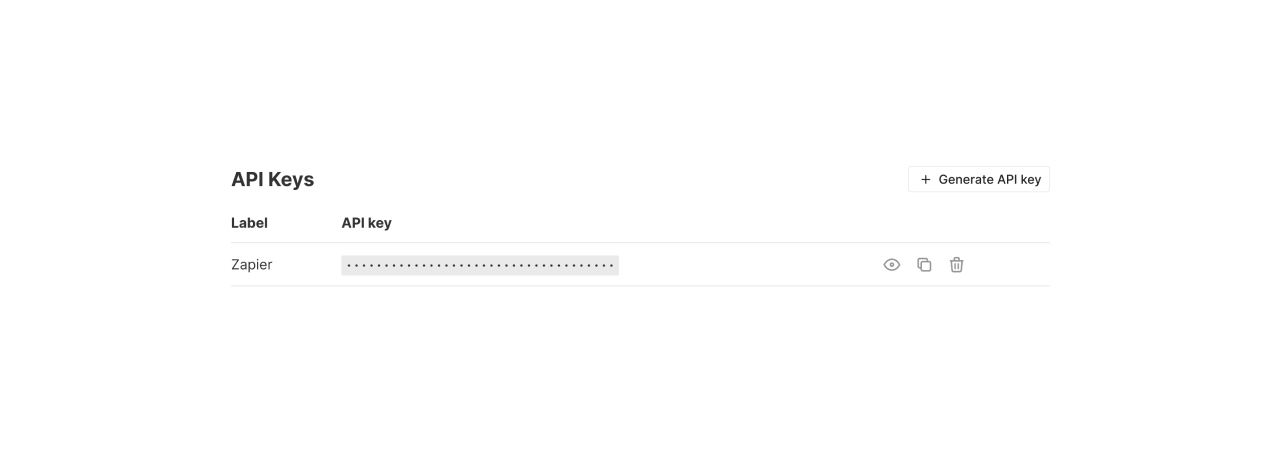
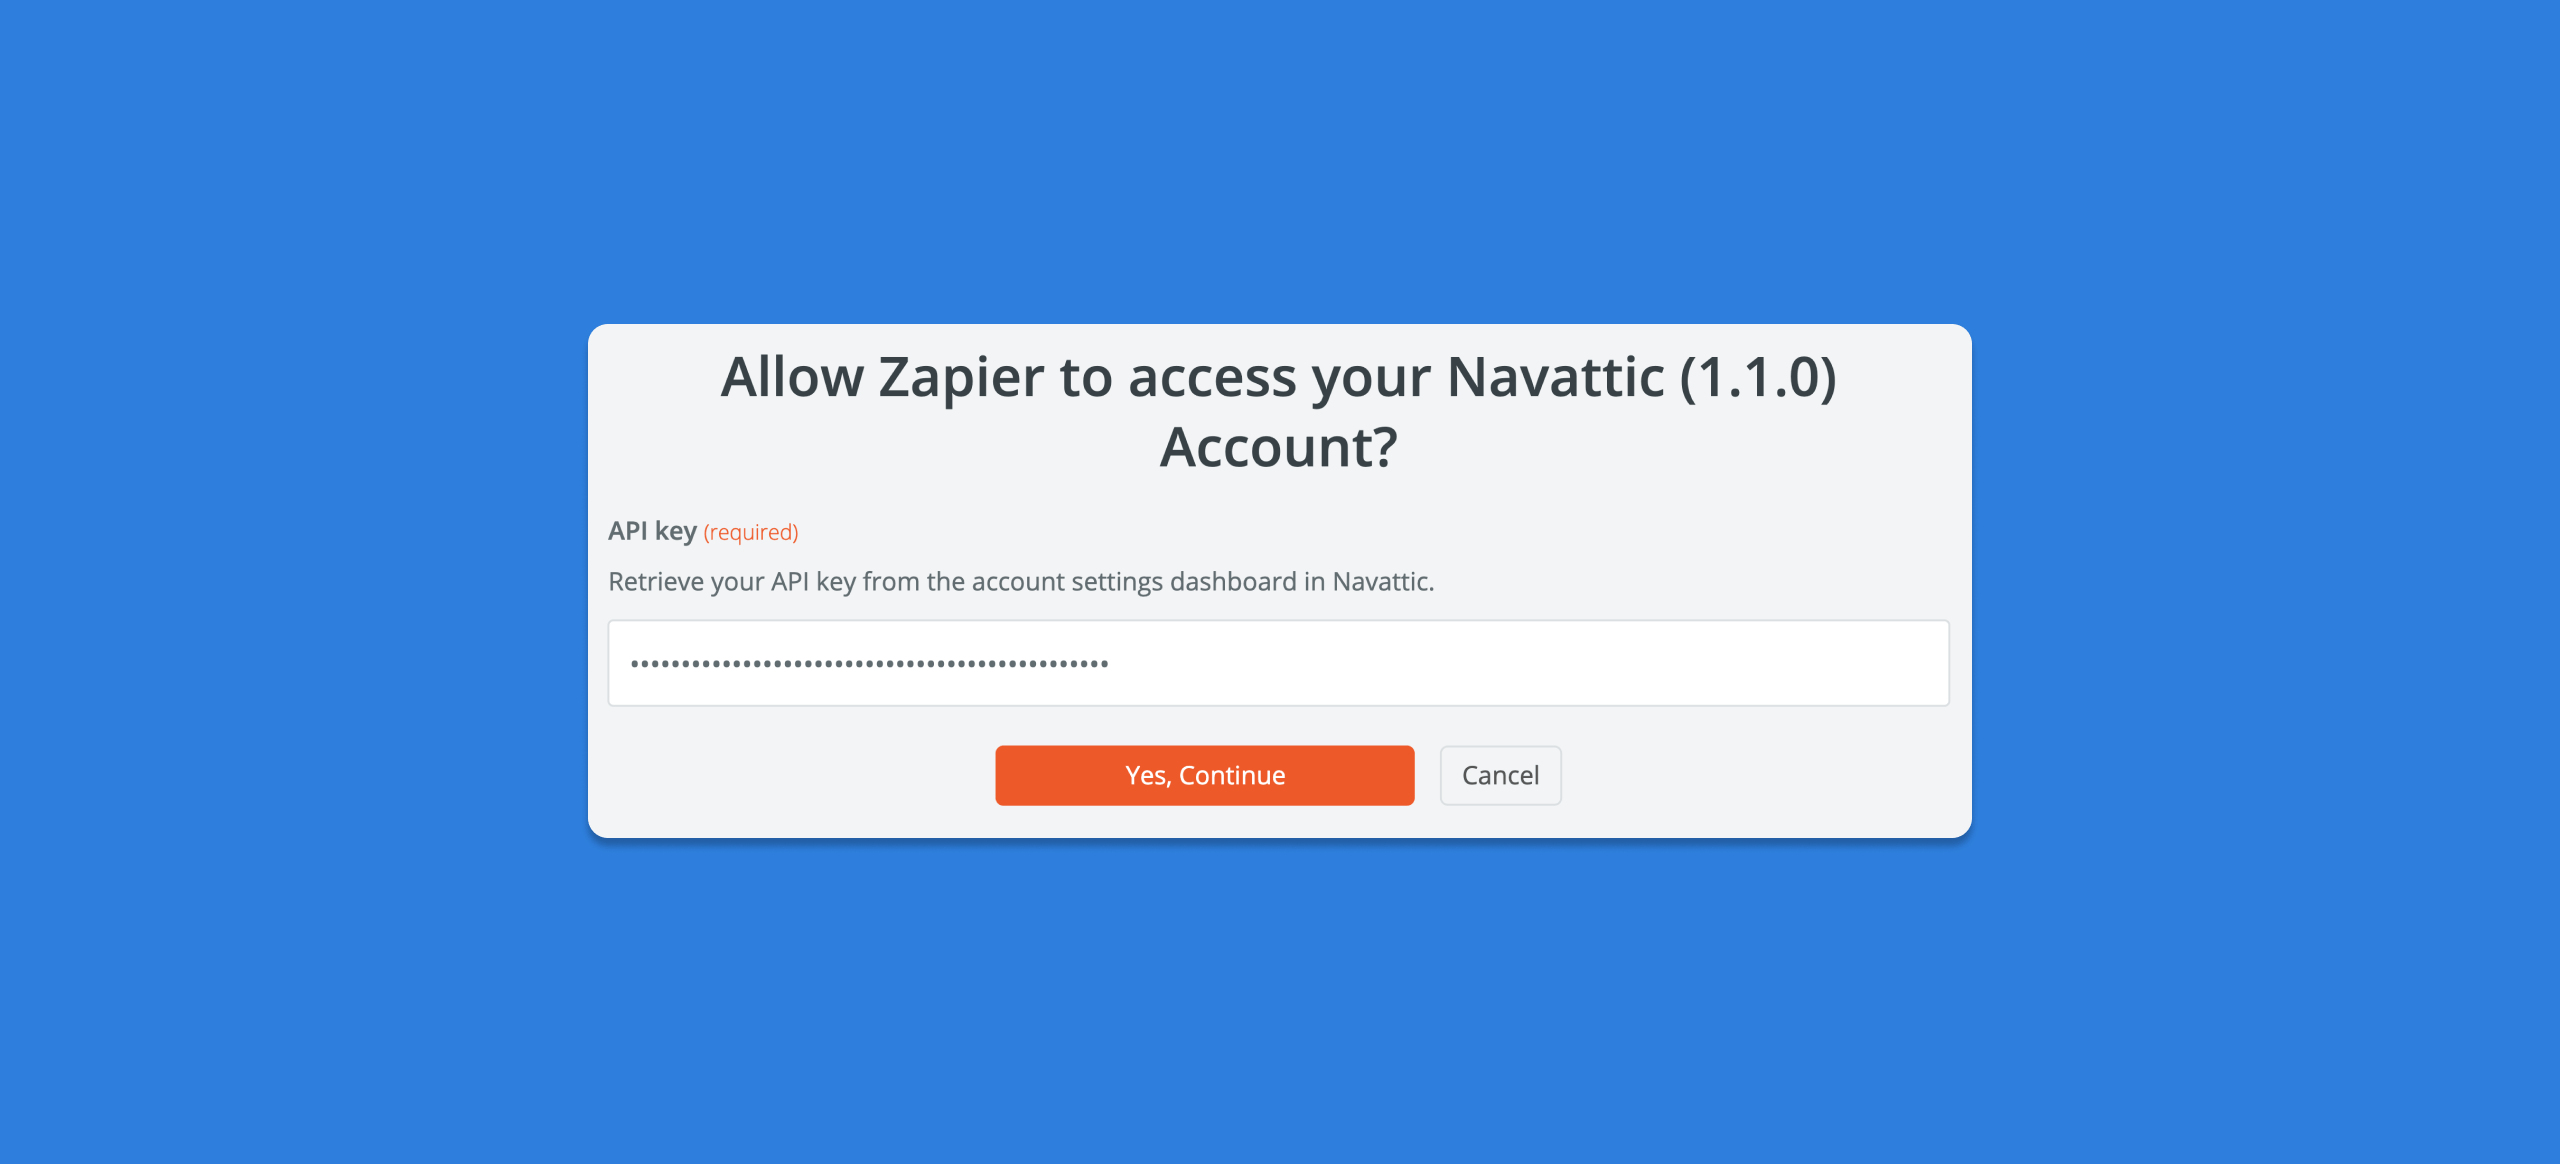
Next, provide Zapier access to your Navattic account by providing your API key.
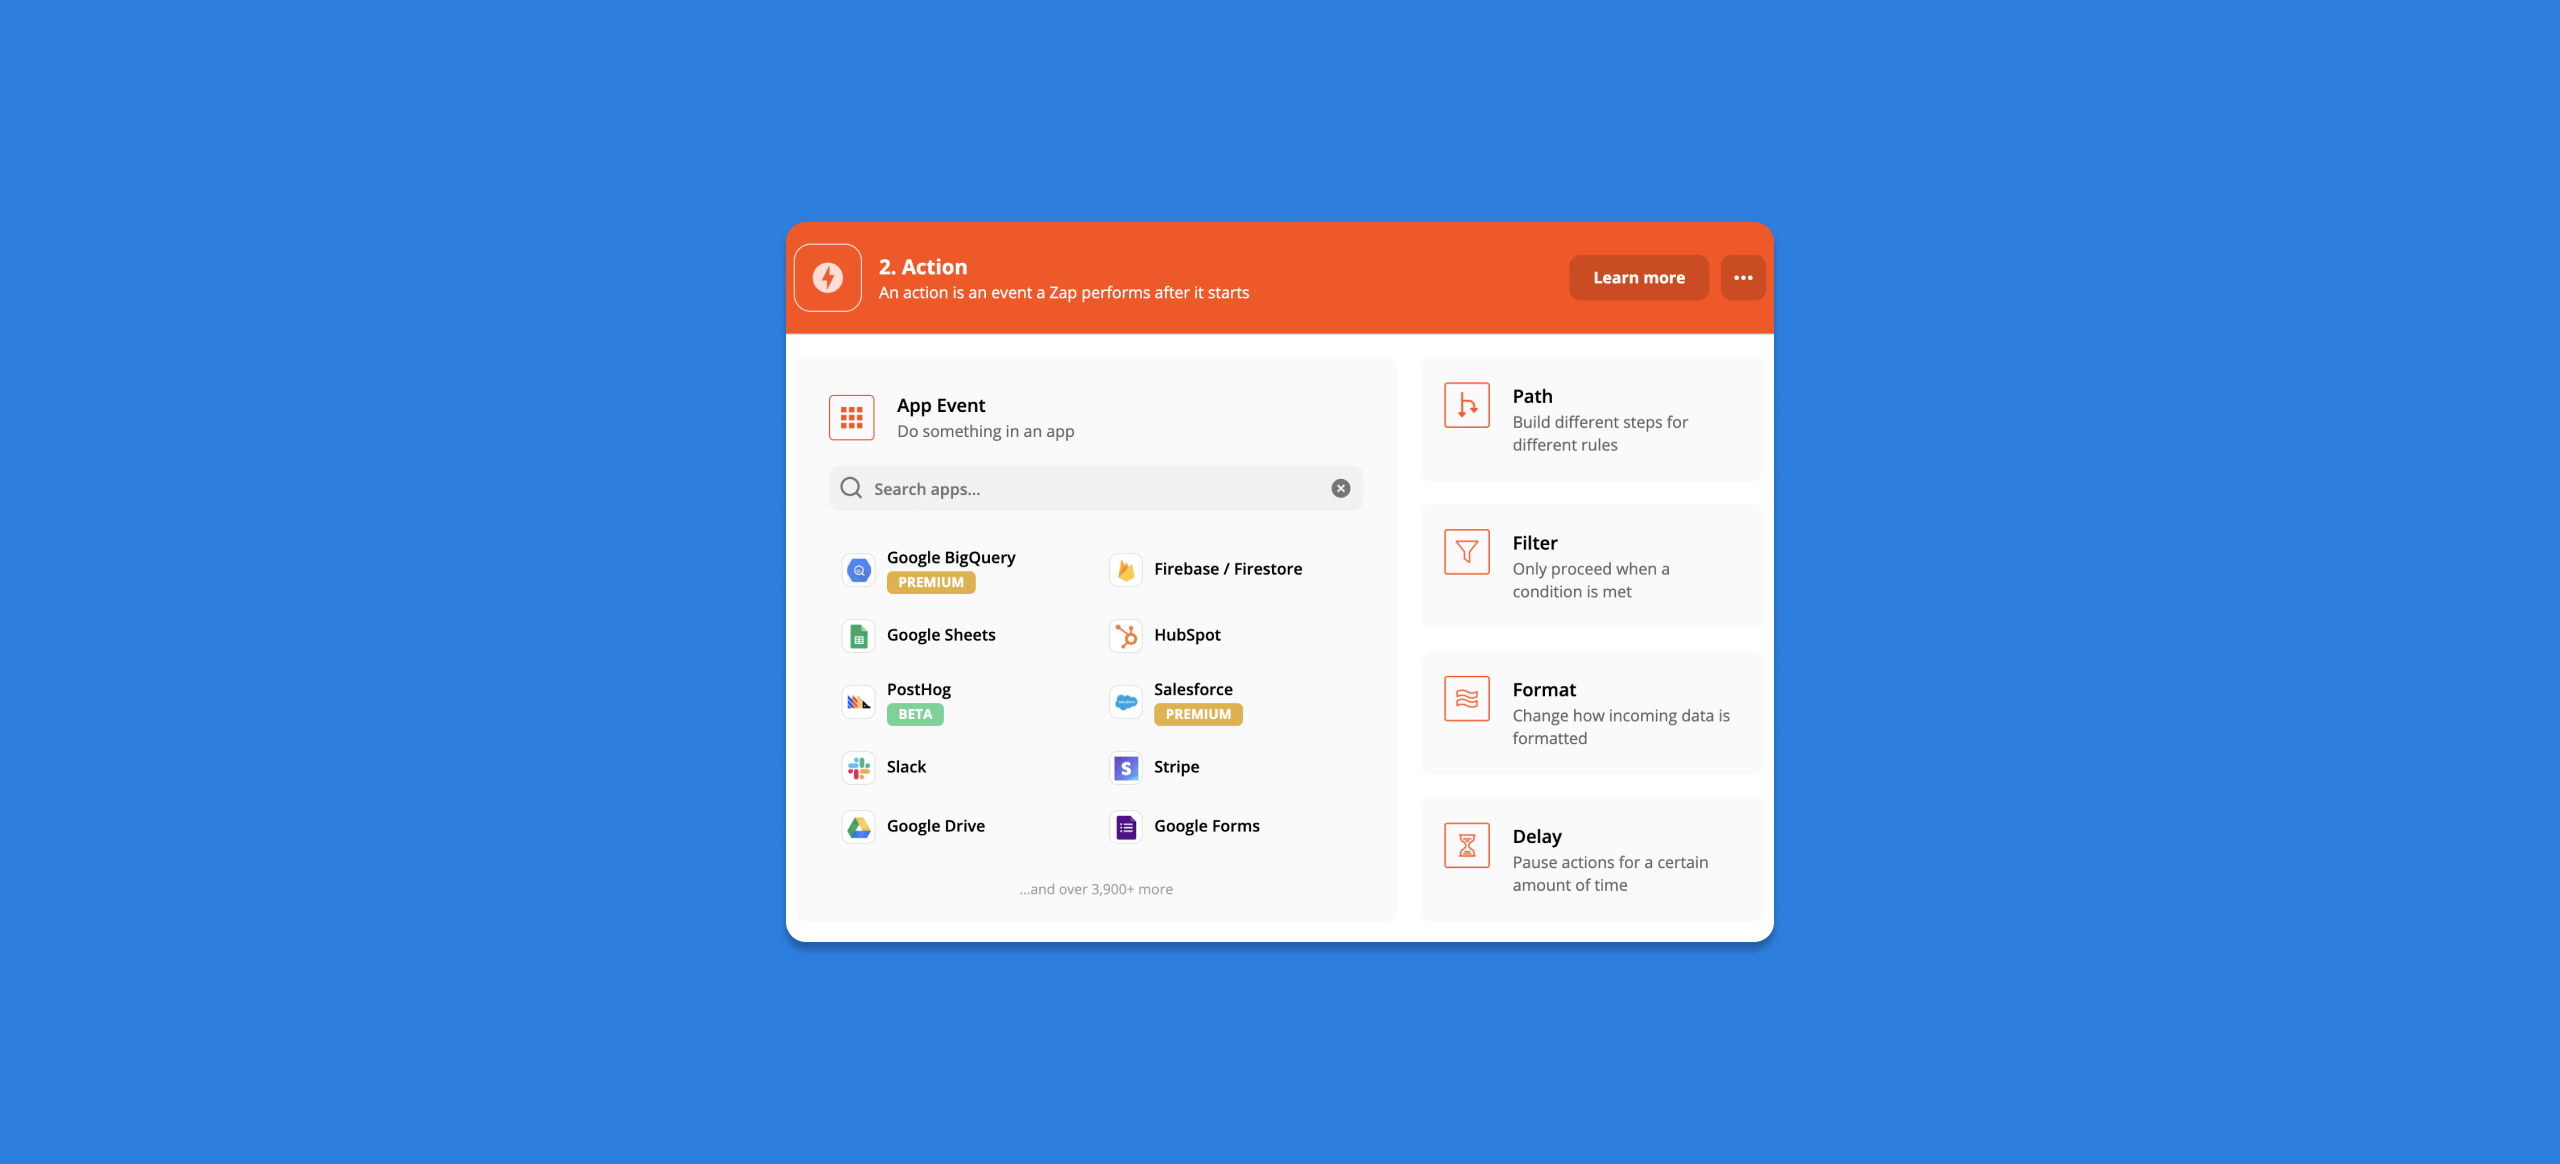
Creating an Action
Choose from over 3,000+ app integrations on Zapier to take an action with a connected app.
Example Action: Adding a Lead to Hubspot
In this example action, we will create a contact in Hubspot whenever the Zap is triggered (a user is identified in a Navattic flow).
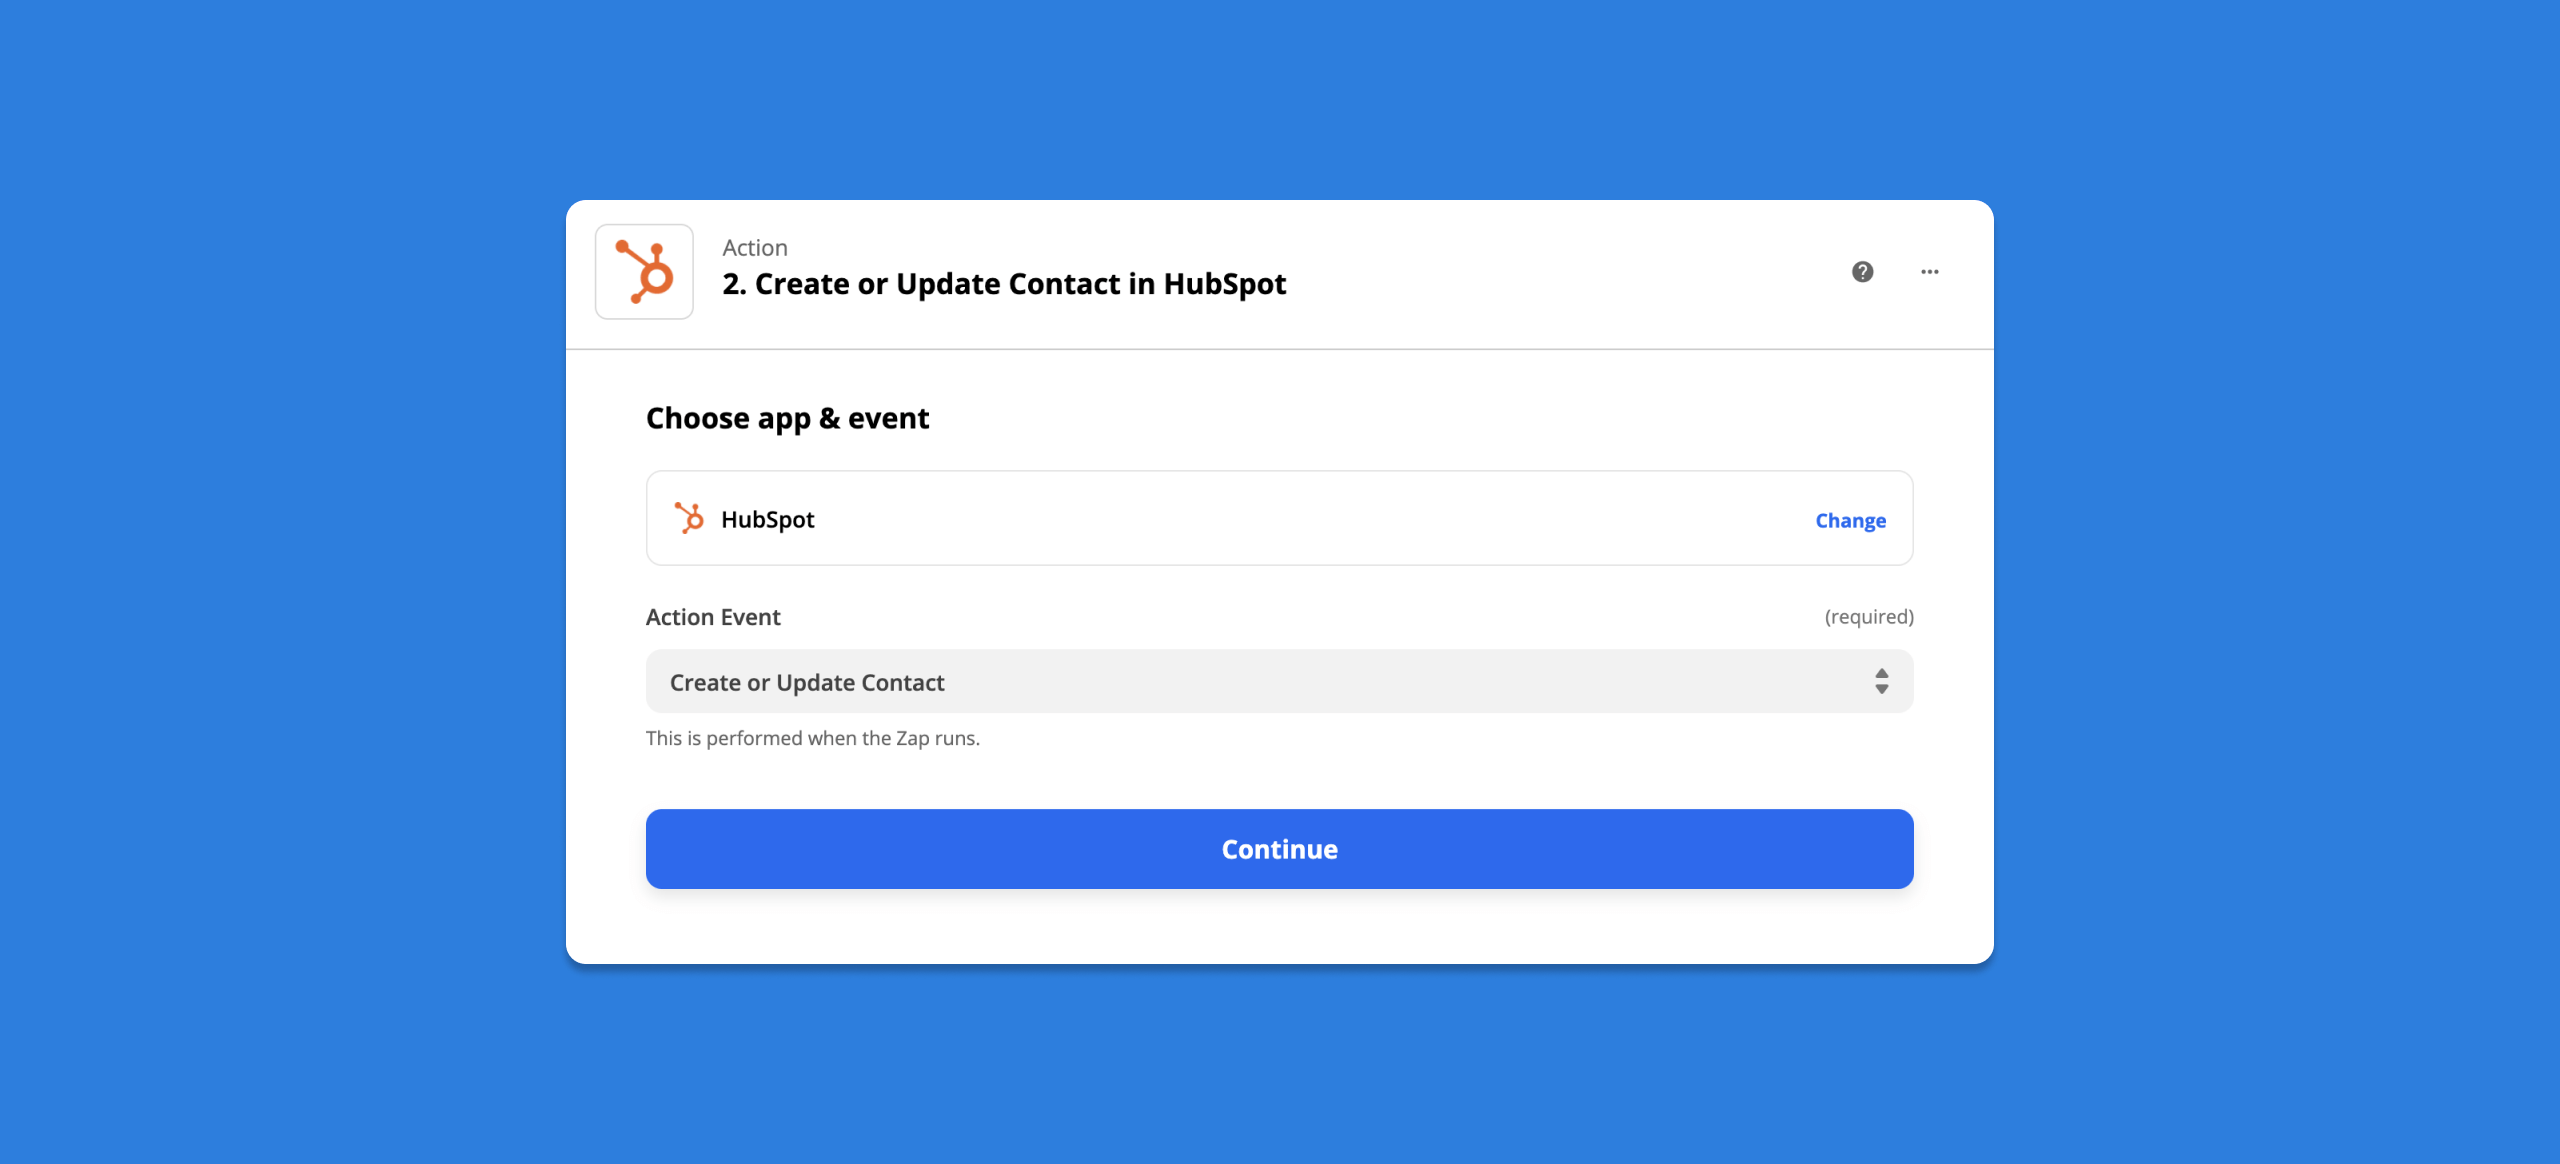
After setting up your Trigger event ("Indentify user event in Navattic"), connect your Hubspot account to Zapier. Choose the Hubspot action event, "Create or Update Contact".
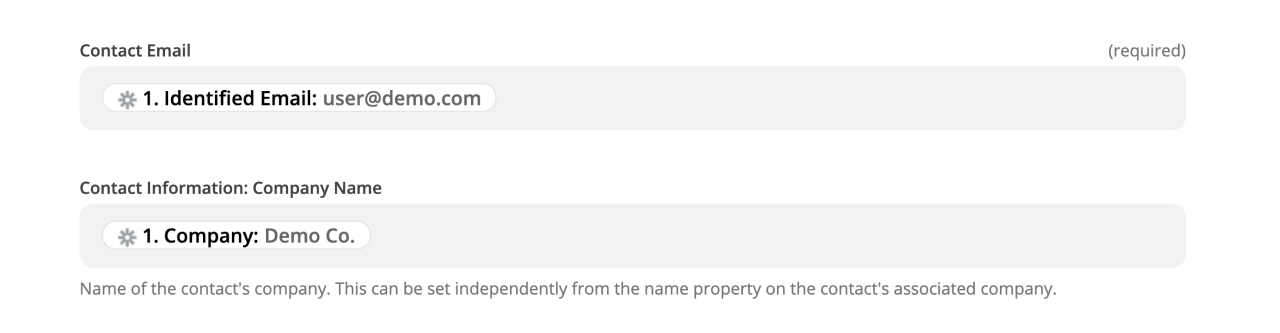
Create a new contact with information pulled from the Navattic form such as identified email:
Test your Zap and turn it on!
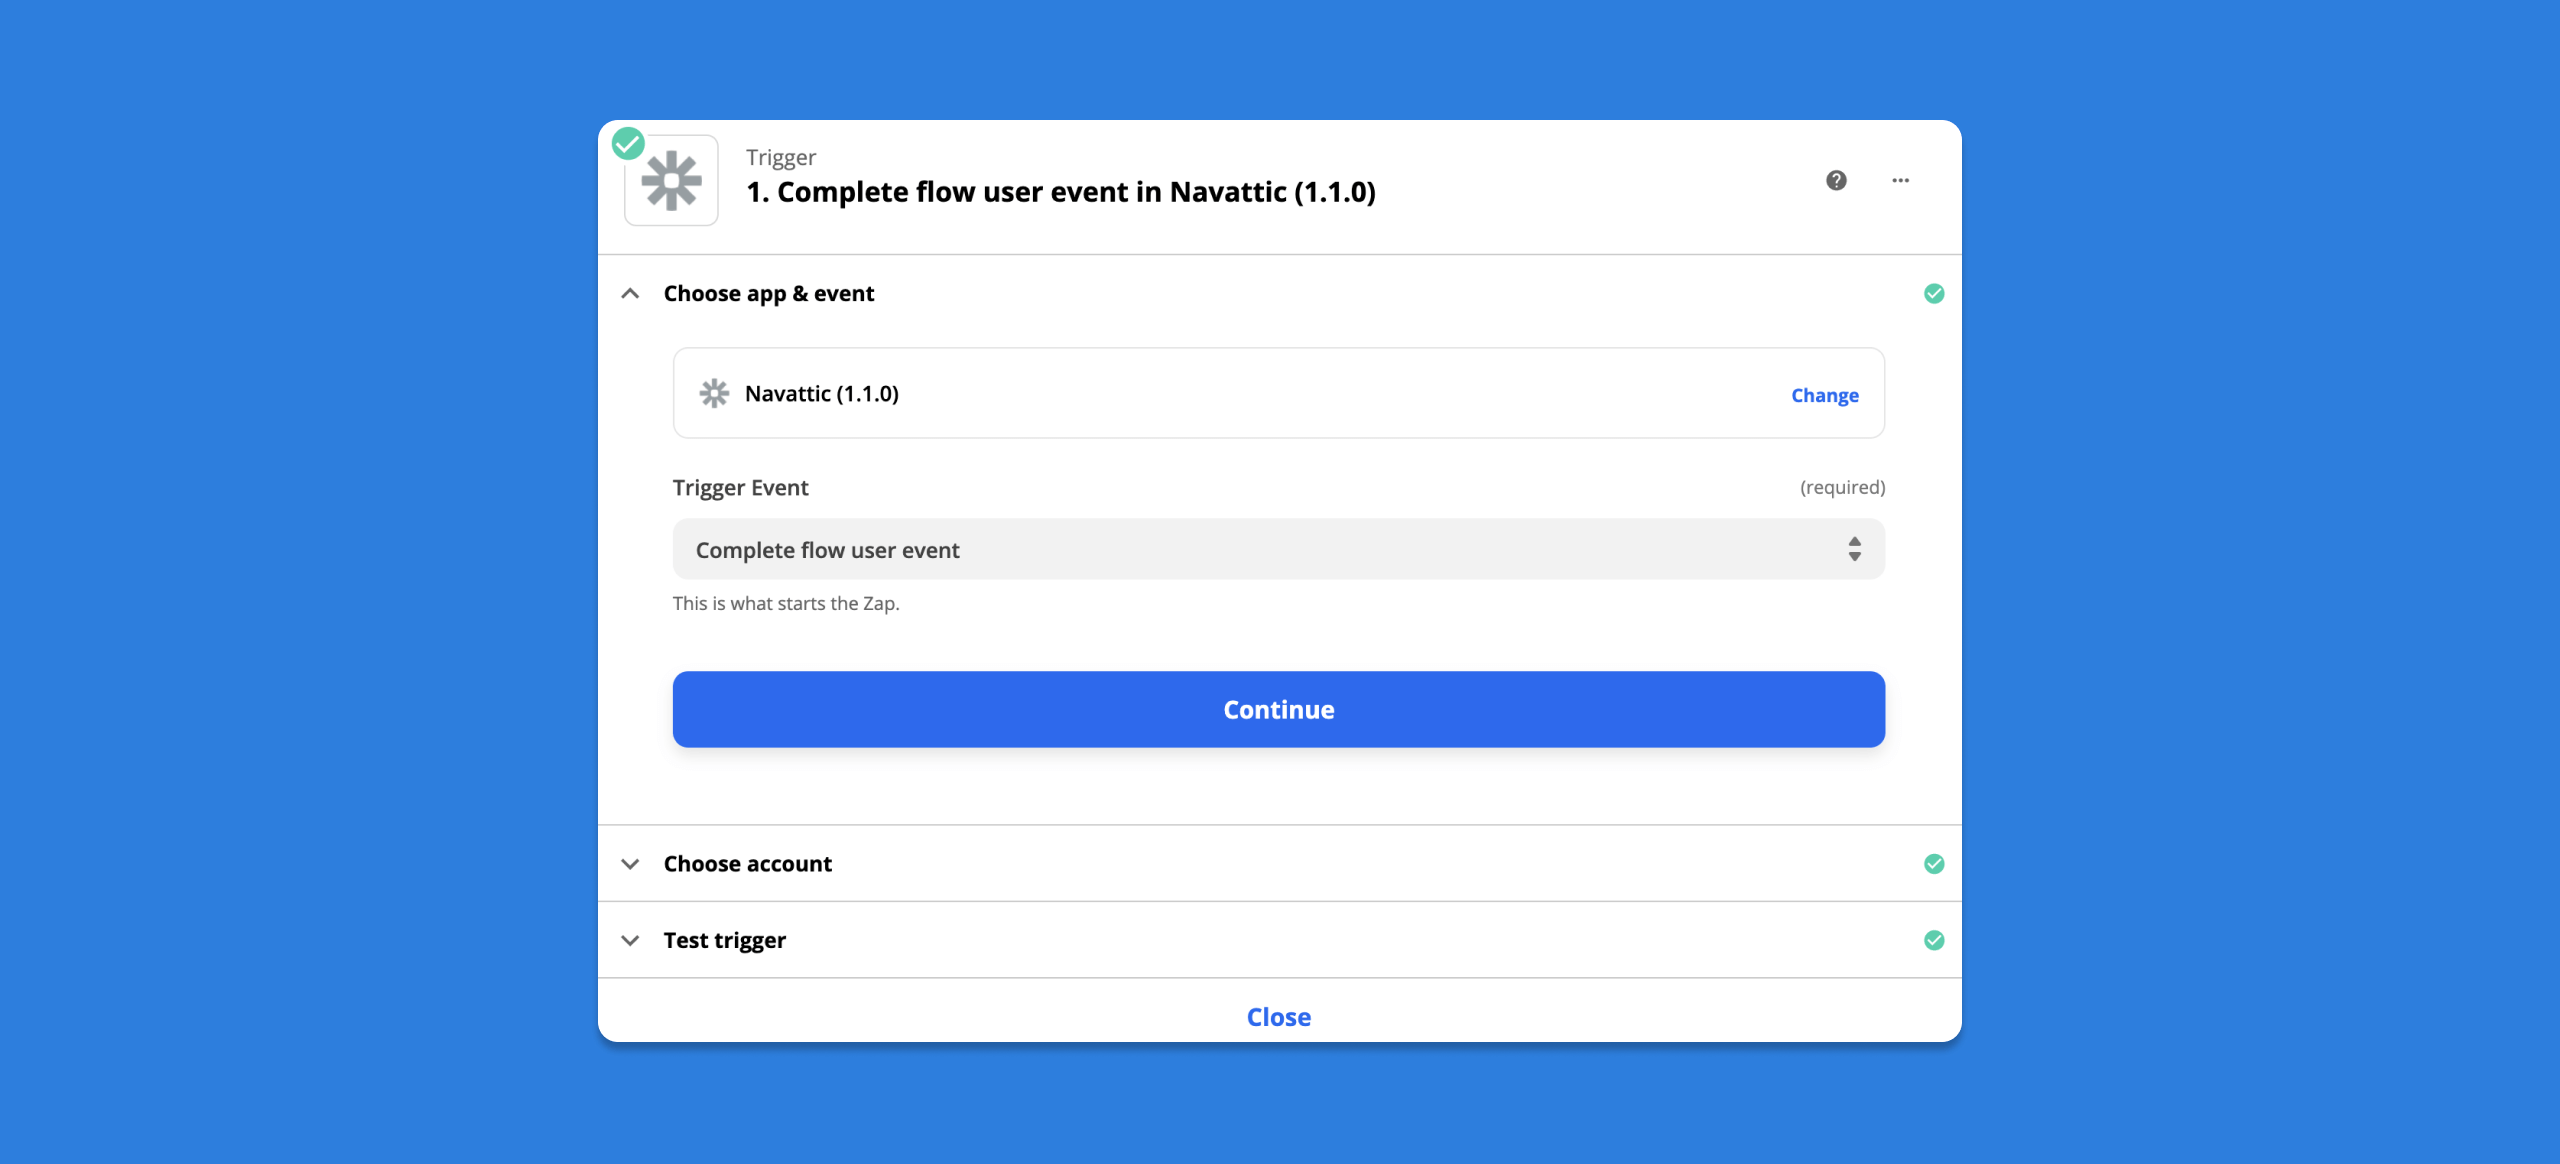
Example Action: Tracking Flow Completion in Hubspot
In this example action, we will create a note for each contact in Hubspot that completes a Navattic flow.
After setting up your Trigger event ("Complete flow user event in Navattic"), connect your Hubspot account to Zapier.
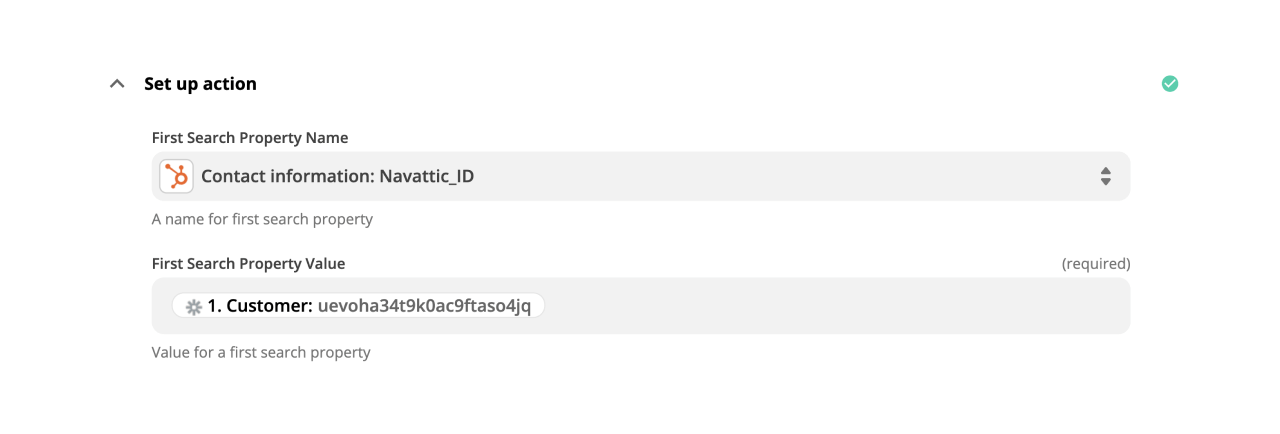
This action will require a custom property in Hubspot. Create a new contact property called "Navattic_ID".
This Zap will consist of two action steps. First, choose the Hubspot action, "Find Contact in Hubspot". To set up this action, select the "Navattic_ID" custom property from the "First Search Property Name" field. Then select the Customer ID (from Navattic) from the "First Search Property Value" field.
Next, choose the Hubspot action, "Create Engagement in Hubspot". In the "Id's Of The Contact Objects That Should Be Associated With Engagement" dropdown, select the ID option from the "2. Find Contact in Hubspot" custom field. Create a note with information you are looking to track like "Workflow" and "Status" to track how that contact has engaged with your Navattic flow.
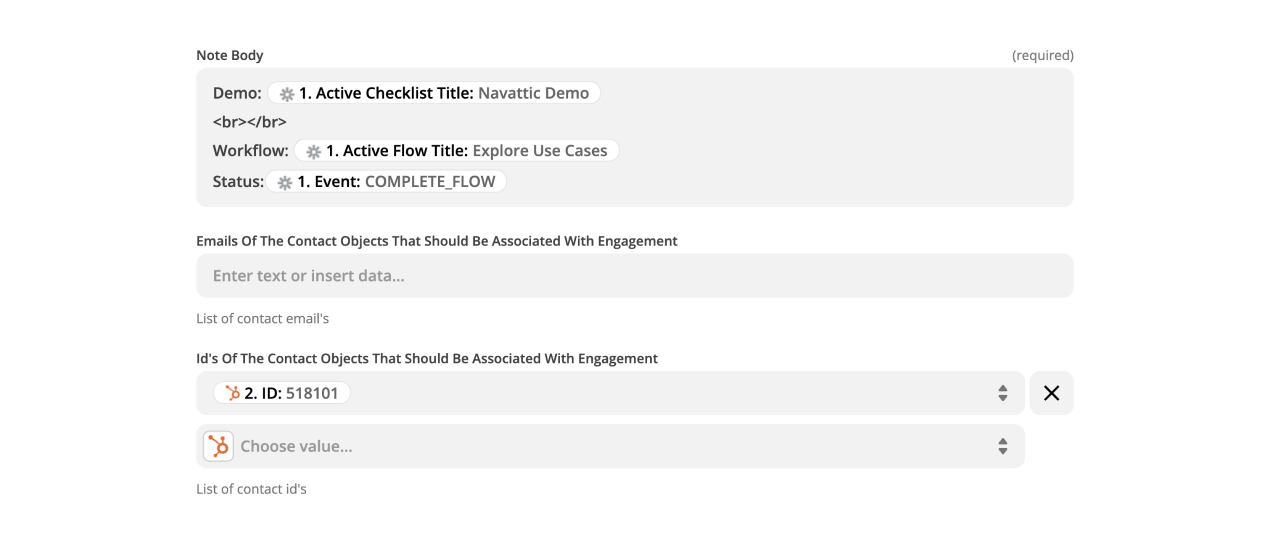
Test your Zap and turn it on!
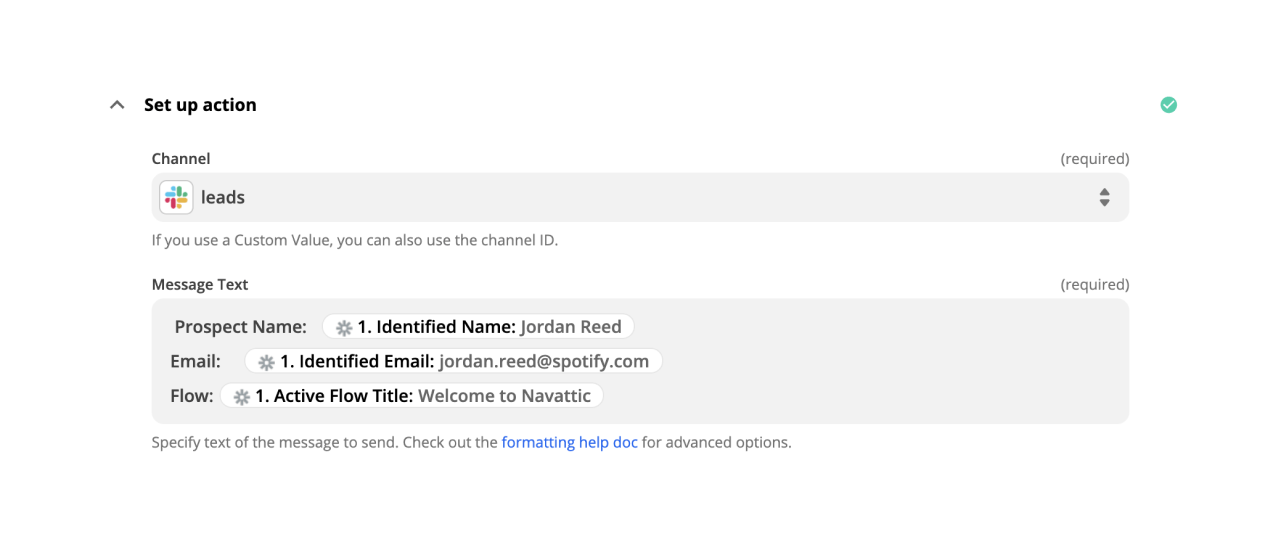
Example Action: Sending Navattic Data to Slack
In this example action, we will send a Slack channel message whenever the Zap is triggered (a user is identified in a Navattic flow).
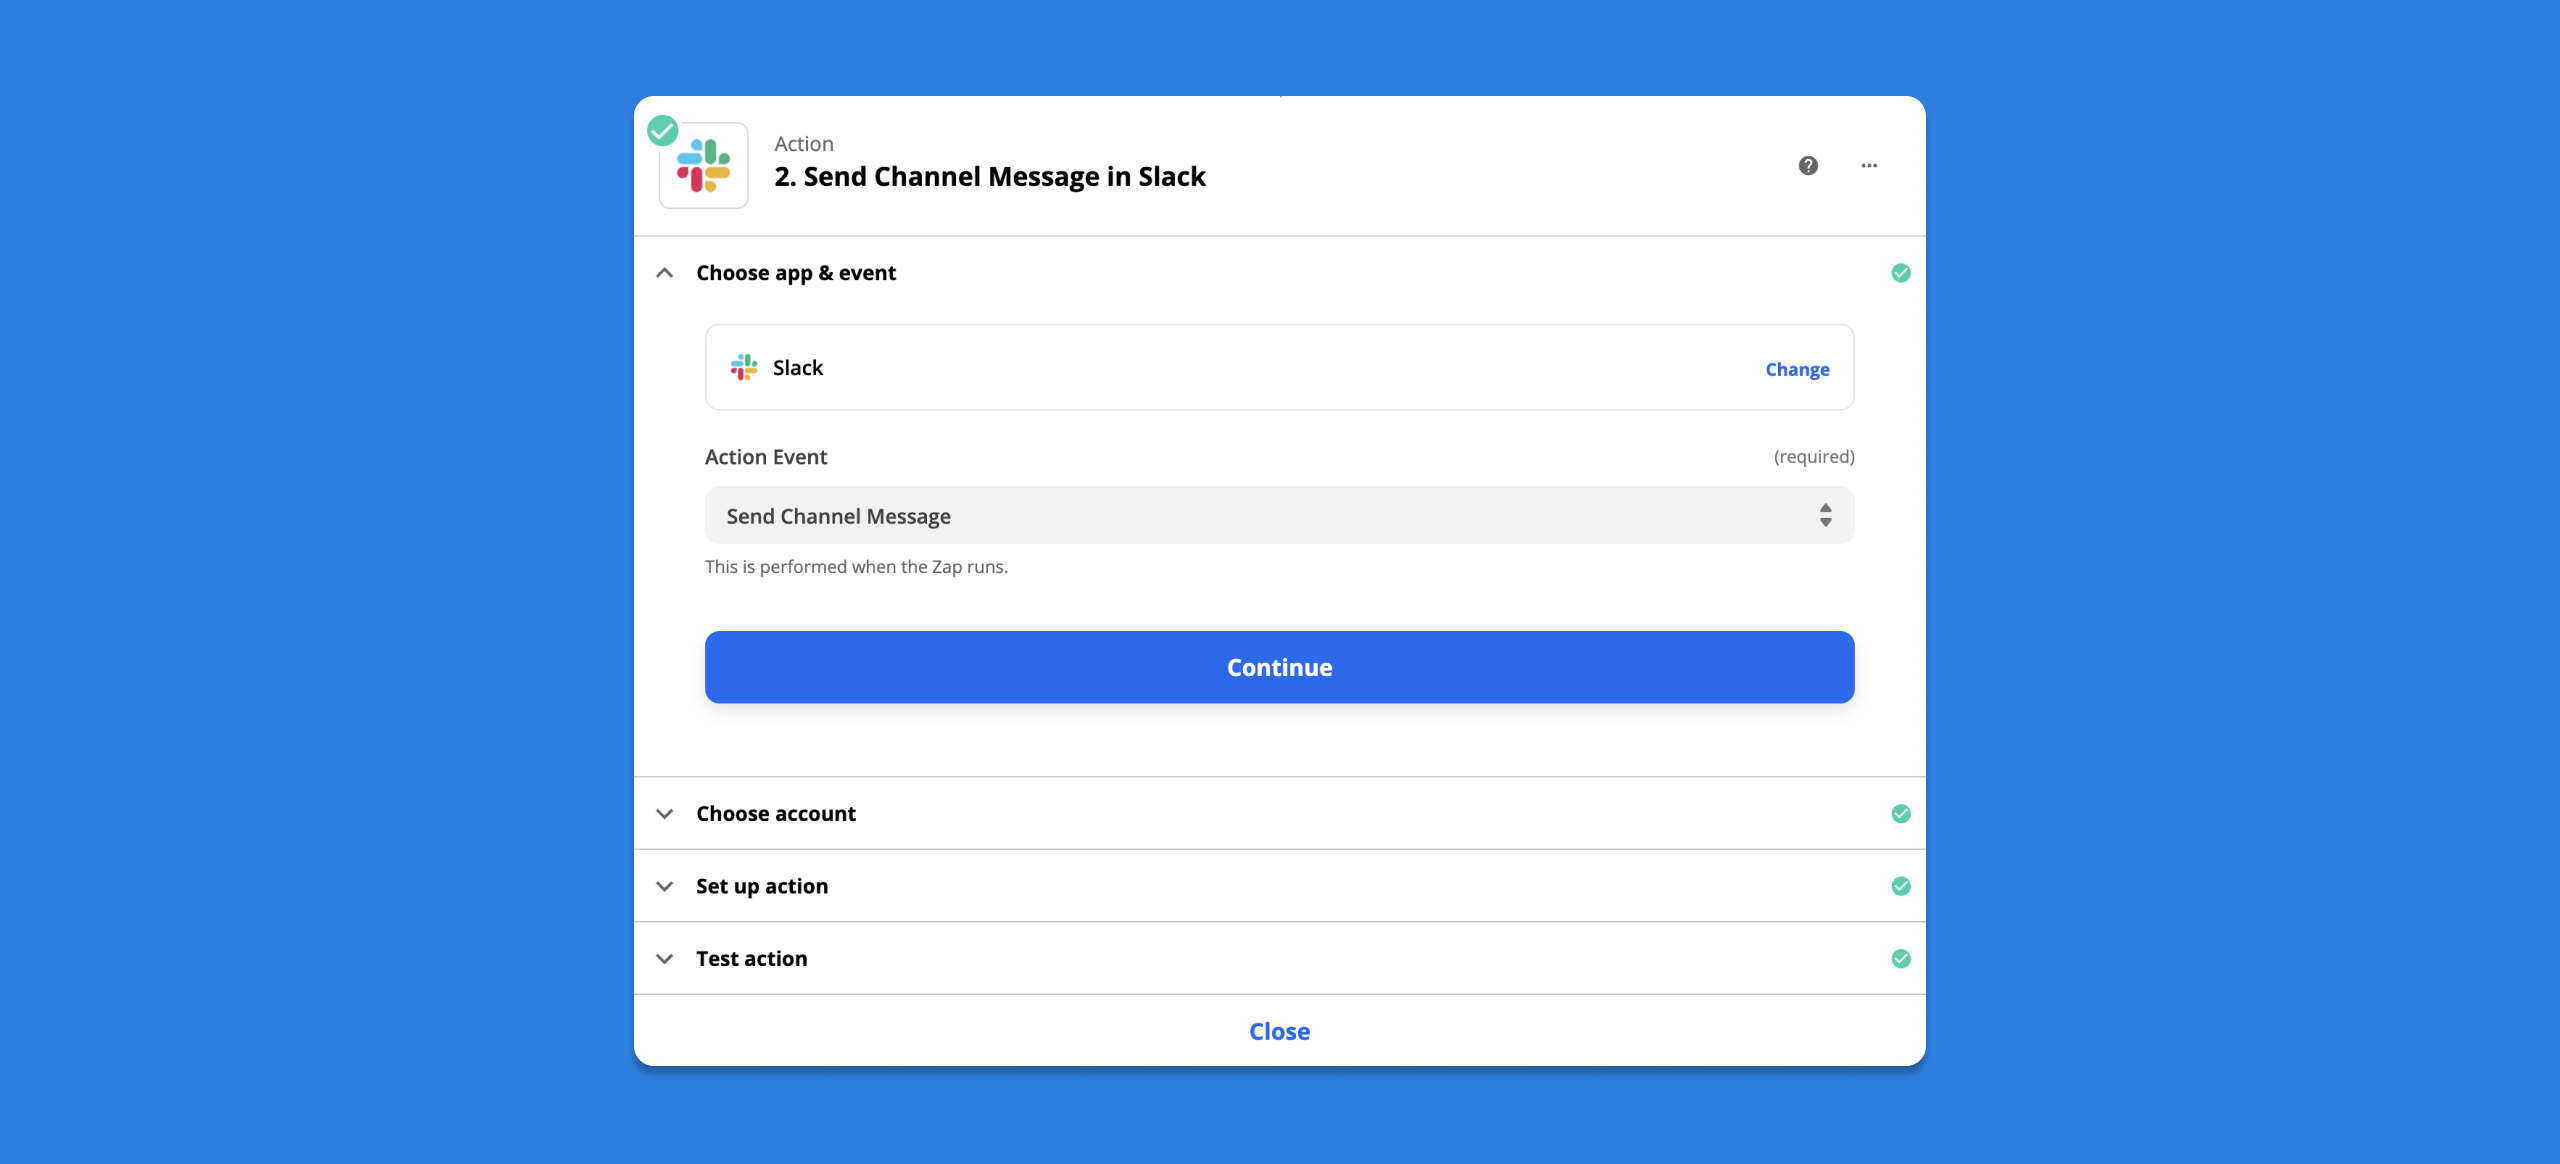
Create a new channel message with the user details collected from a Navattic form.
Test your Zap and turn it on!
Webhooks
Building custom webhooks allow you to listen to events from Navattic in real-time so that your app can build-out custom workflows. Using webhooks requires you to write custom code on your own backend system or use a pre-built service to ingest webhook events (such as pipedream). Navattic uses HTTPS to send these notifications to your webhook endpoint via JSON payload in a POST request.
When to use webhooks
If you want to send Navattic engagement data in real-time to a backend system that isn't supported by one of our native integrations, webhooks are the best option. Webhooks can be thought of as real-time push notifications. You can use these notifications to build custom workflows in your own backend systems.
Events overview
If you've registered a webhook endpoint to receive a START_FLOW event, the event payload sent via HTTP POST request will be formatted like the below example.
Example payload
{
	event: "START_FLOW",		// See all event types listed below
	data: {
		customer_id: "cl7hpqojx00013b6komt3wvr2",
		session_id: "cl7hpqojy00023b6k1prgodpl",
		project: {
			id: "cl1298b23kj400033b6k2gikq84v",
			name: "Test project"
		}
		flow: {
			id: "cl7hpqojy00033b6k2gikq84v",
			name: "Test flow"
		},
		checklist: {
			id: "cl7hpqojy00063b6ksm1s1h2z",
			name: "Test checklist"
		}
	},
	timestamp: "2022-08-31T14:21:46.888Z"
}
Event types
| Event | Description |
|---|---|
| VIEW_STEP | Sent when any flow step is viewed |
| START_FLOW | Sent when a flow is initiated |
| COMPLETE_FLOW | Sent when an End User reaches the last step of a flow OR completes a "Complete flow" action |
| START_CHECKLIST | Sent when a checklist is loaded for the first time |
| OPEN_CHECKLIST | Sent everytime the checklist toggle is clicked to expand the checklist |
| CLOSE_CHECKLIST | Sent everytime the checklist "x" is clicked to close the checklist |
| COMPLETE_TASK | Sent when an End User completes a flow in a checklist task OR navigates to a URL in a checklist task |
| CONVERTED | Sent when an End User completes a "Mark as converted" action |
Ready to go live with your webhook?
Once you've created a webhook endpoint to ingest events, you'll need to register the endpoint in Navattic and configure it to listen to specefic event types and projects.
Register your webhook endpoint in Navattic
- Navigate to the Integrations page
- Click the webhook integration
- Enable the integration by clicking the top toggle
- Insert your webhook endpoint in URL Endpoint
- Click save
- Navigate to the Event Settings tab
- Enable the events that you want to listen to
- Click save
- Navigate to the Projects tab
- Enable the projects that you want to ingest events from
Webhook URL Endpoint format
https://<your-website>/<your-webhook-endpoint>