Projects
Creating a project
A project is a structure to organize different demos into a library of interactive demos each with a standalone, sharable link.
Building a Project
To create a project, select "Create new" from the Projects menu.
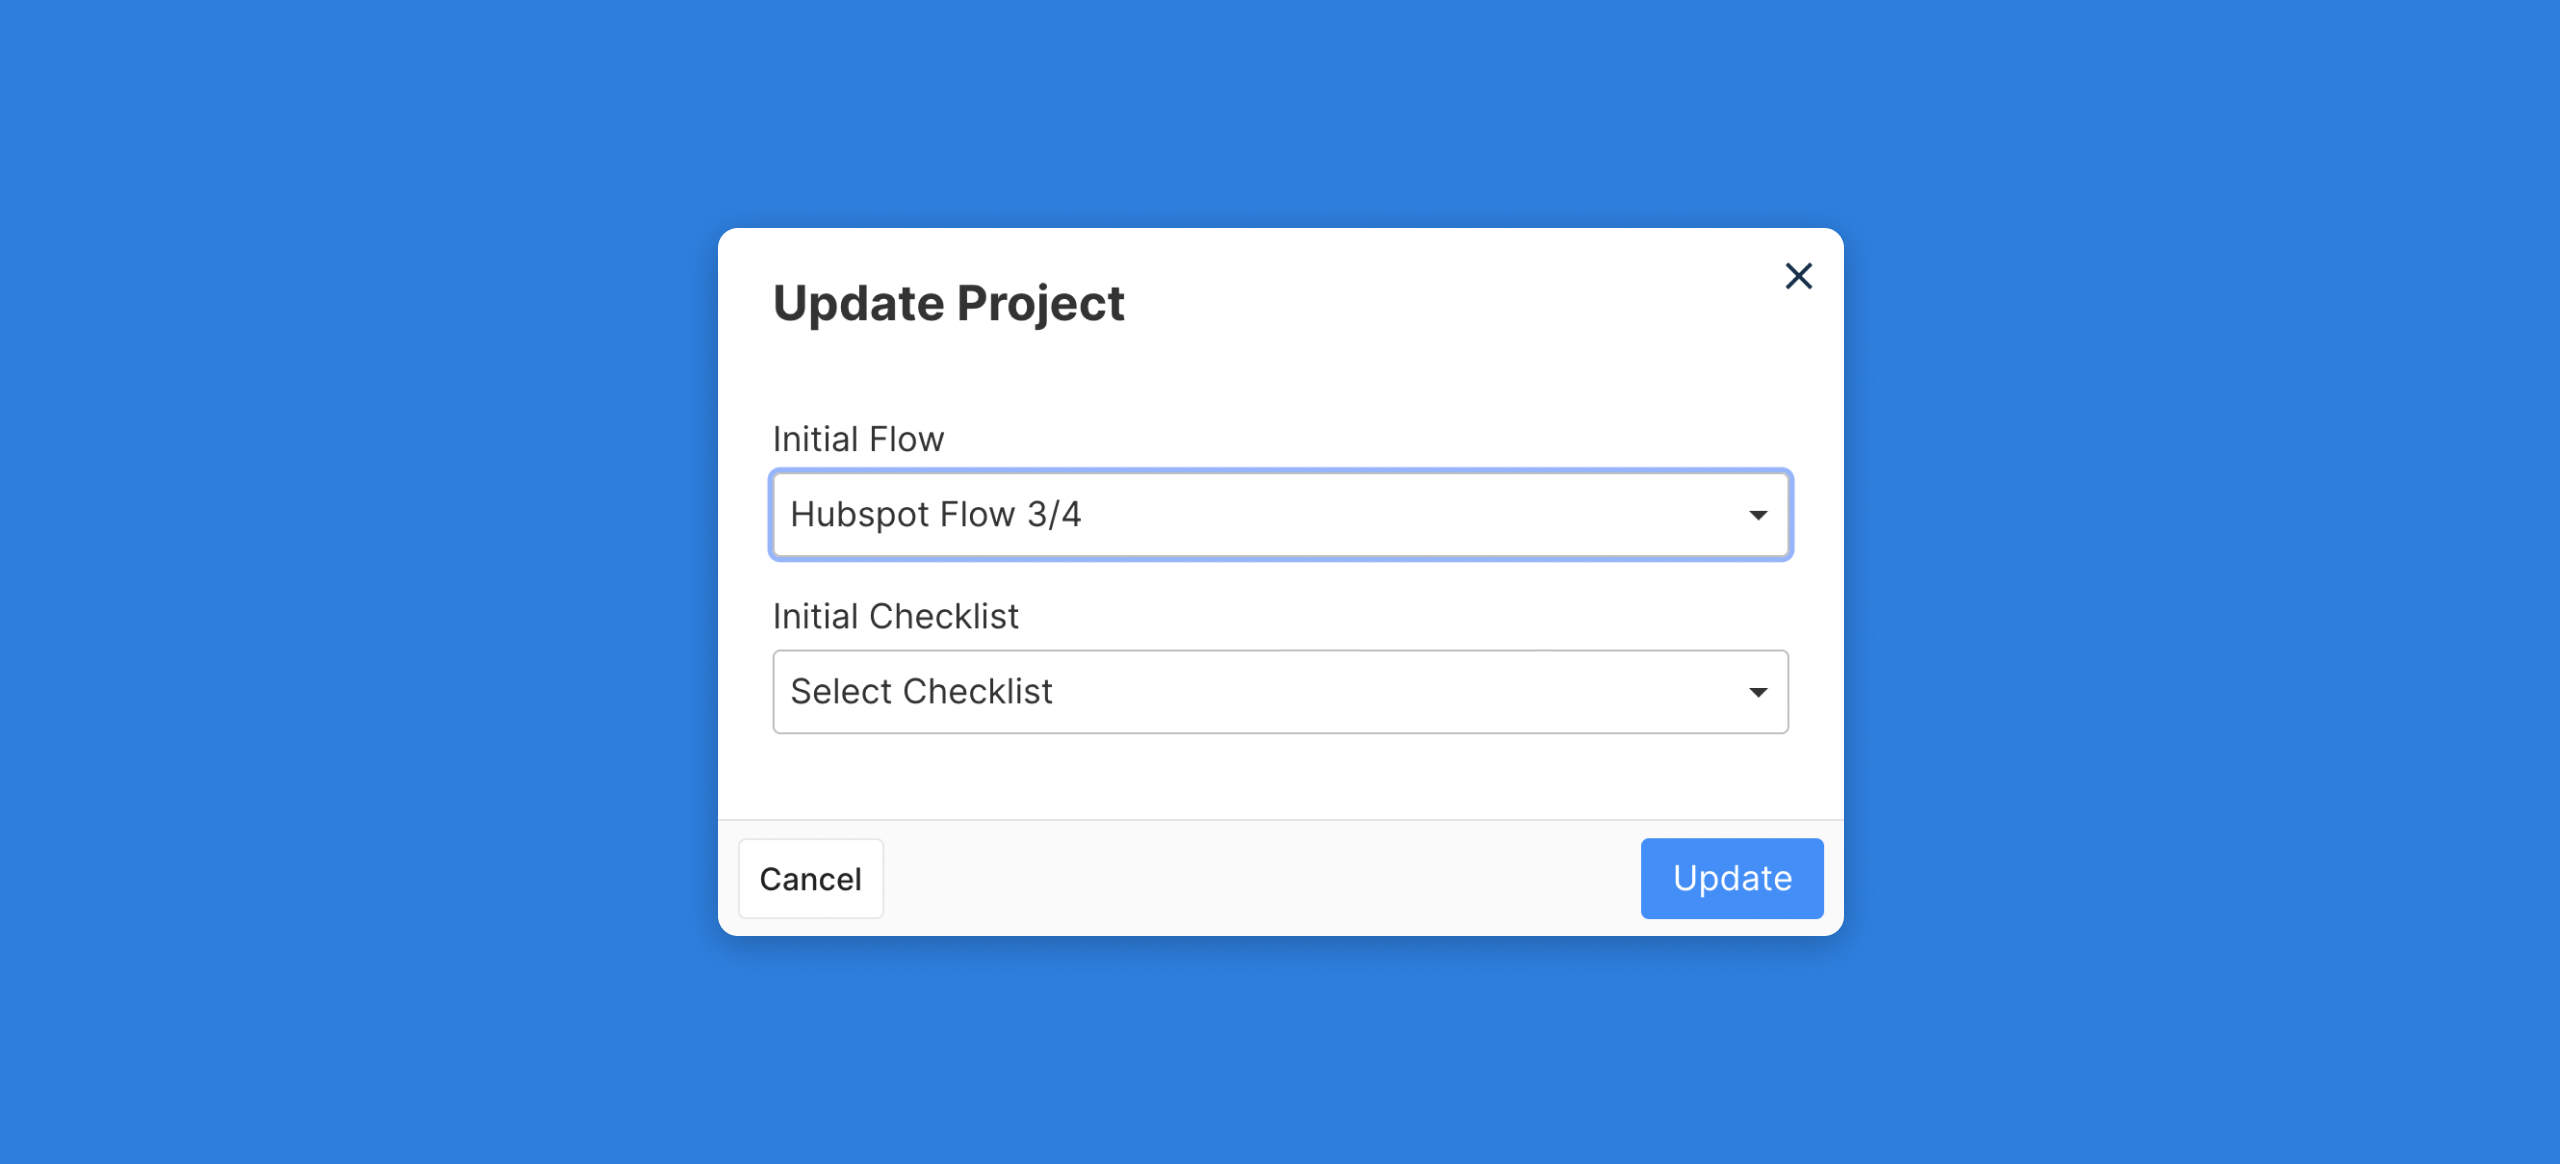
Next, enter a title for the Project and assigned an starting flow that you want a user to experience when opening this link along with a starting checklist (optional). The initial flow is required and will be the first flow that will appear when a user accesses the project link (e.g., a welcome flow or the single flow for a project). The initial flow and checklist can be edited later and will be updated whenever a change to the flow or checklist is made.
Editing a Project
After the project is created, you will have a new project added to your Projects menu. From this view, you can visit or copy a project URL for easy access and sharing.
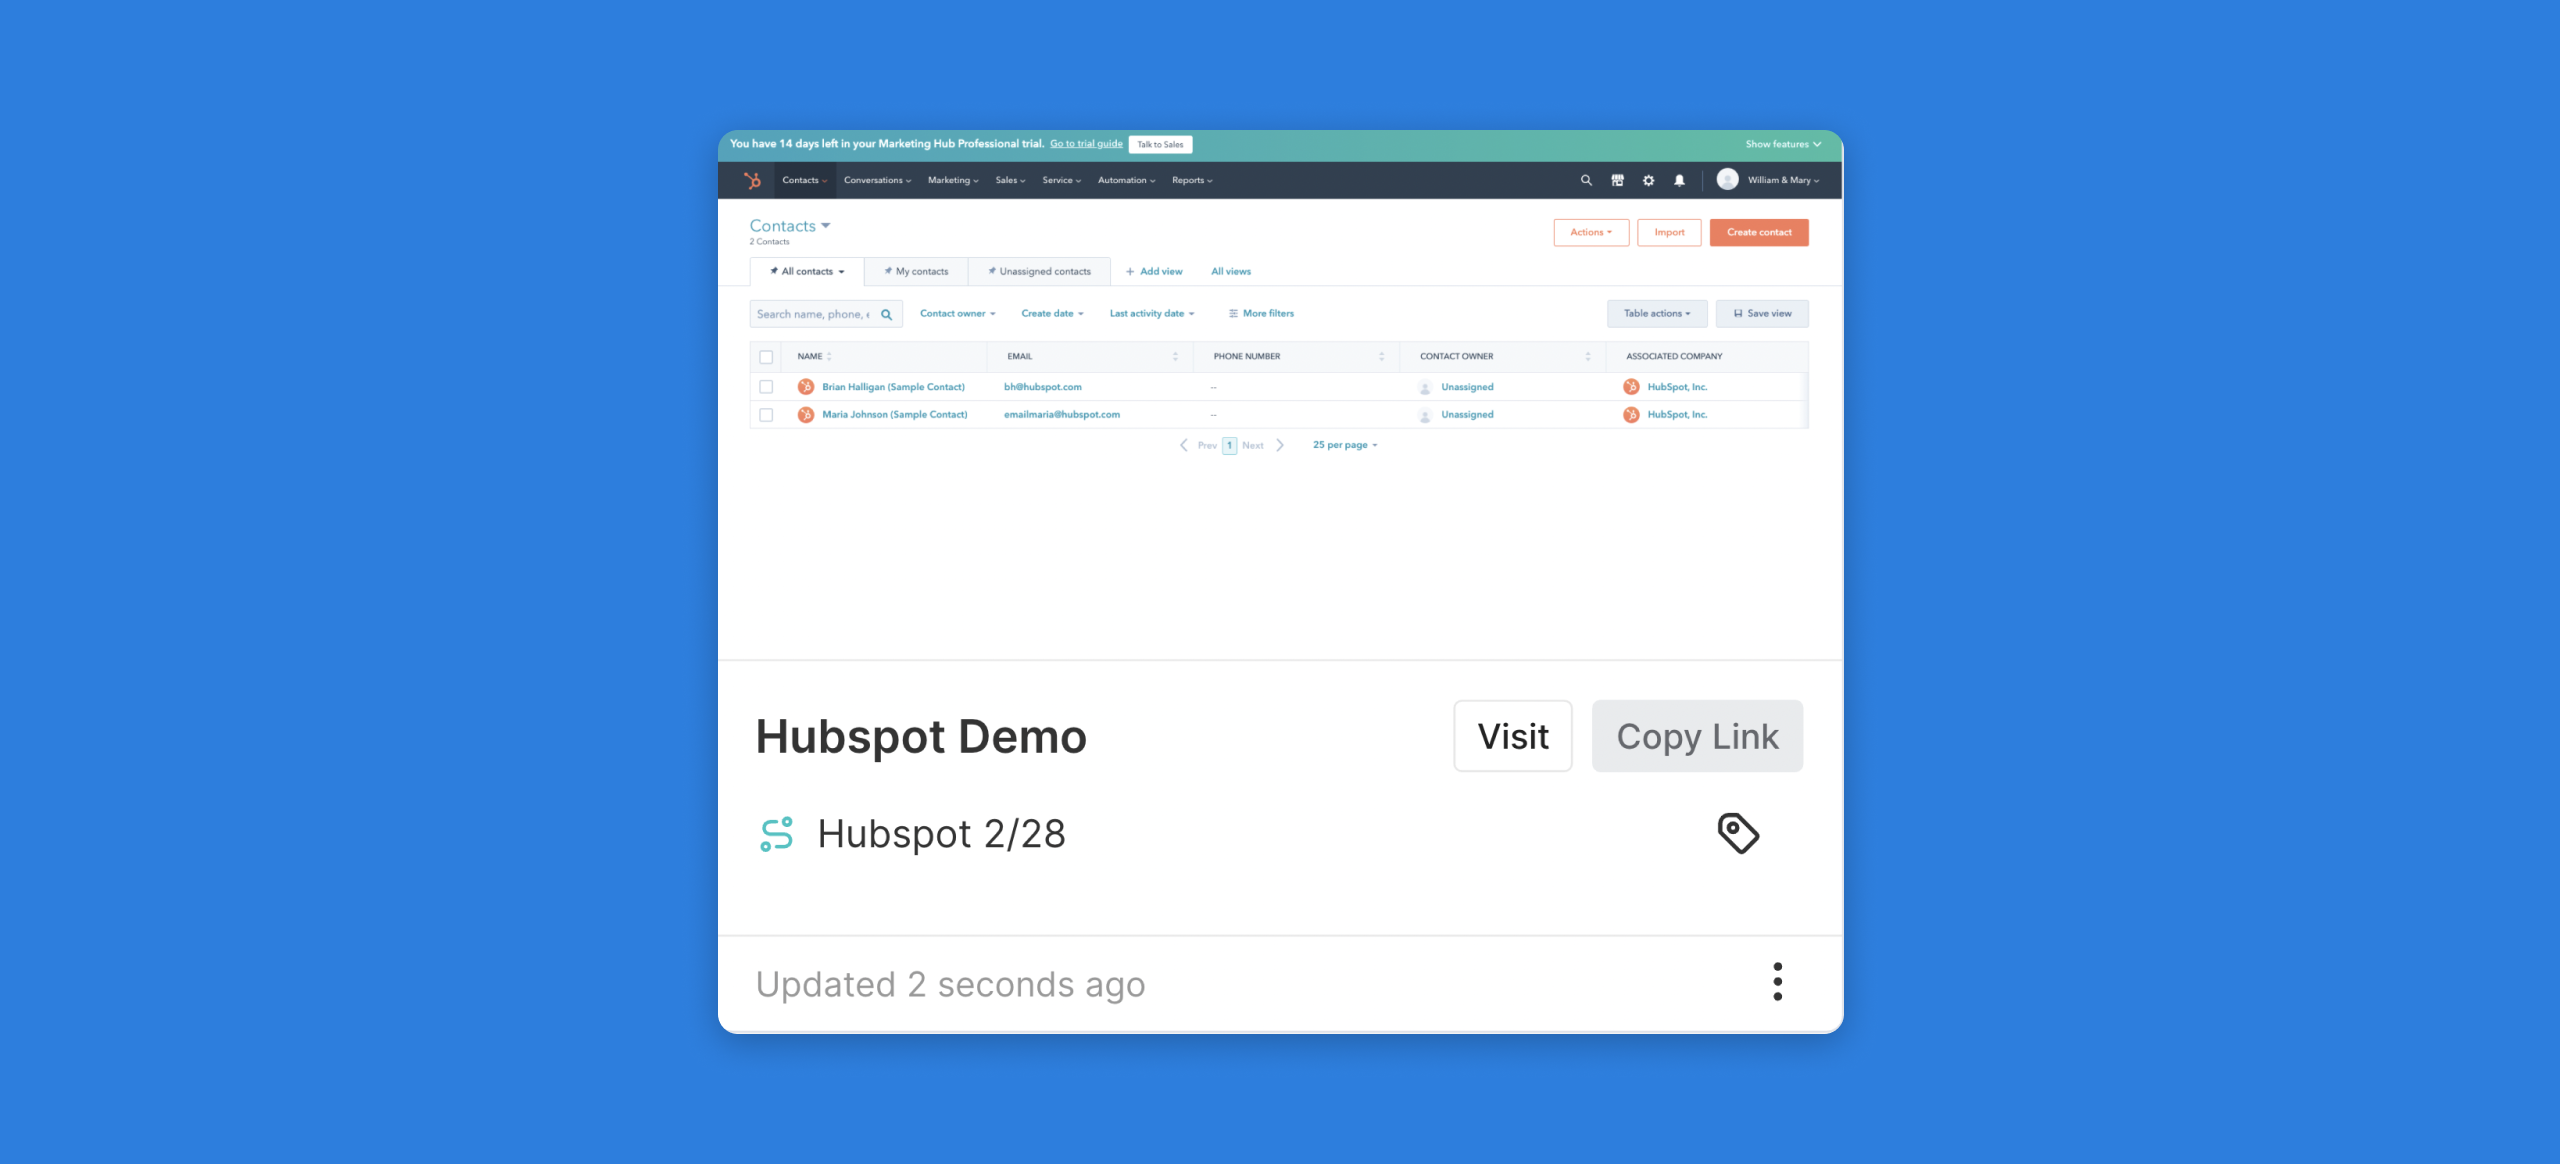
To access an individual, you can click into a project to view details and project-level analytics.
If you create a new flow or checklist and would like to associate with the project, select the pencil icon next tot Initial Flow or Initial Checklist to open the Update Project menu where you can select new options from the dropdown. This will automatically change the associated initial flow and checklist for the project.
Embedding a Project
Projects can be added as an embedded Inline Frame (iframe) within a webpage. These iframes can be full screen or a set width and height.
Basic iframe Embed Snippet
<iframe
	src="SOURCE_URL"
  	height="720px"
  	width="1440px"
  	style="border:0"
></iframe>
Embed Settings
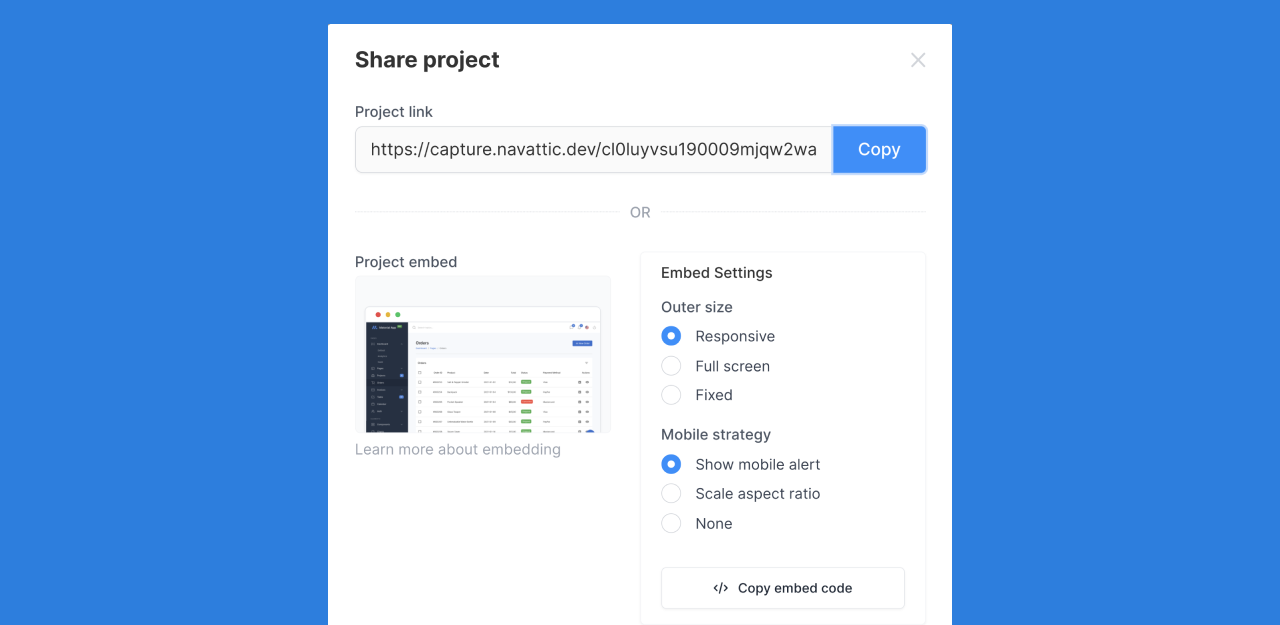
Responsive Embed
A responsive emebed will adjust the iframe size based on the width of the parent element by creating an intrinsic ratio that scales on a viewer's device.
Full Screen Embed
A full screen embed will cover the entire viewport so that a viewer will see the product tour in the entire browser window.
Fixed Embed
A fixed embed will generate an iframe snippet with a set width and height (in pixels).
Mobile Strategy
While product tours built on Navattic are optimized for desktop viewing, some teams may opt for a mobile experience as well. By default, Navattic product tours viewed on a device with a width of less than 800px will display a mobile redirect message for viewers.
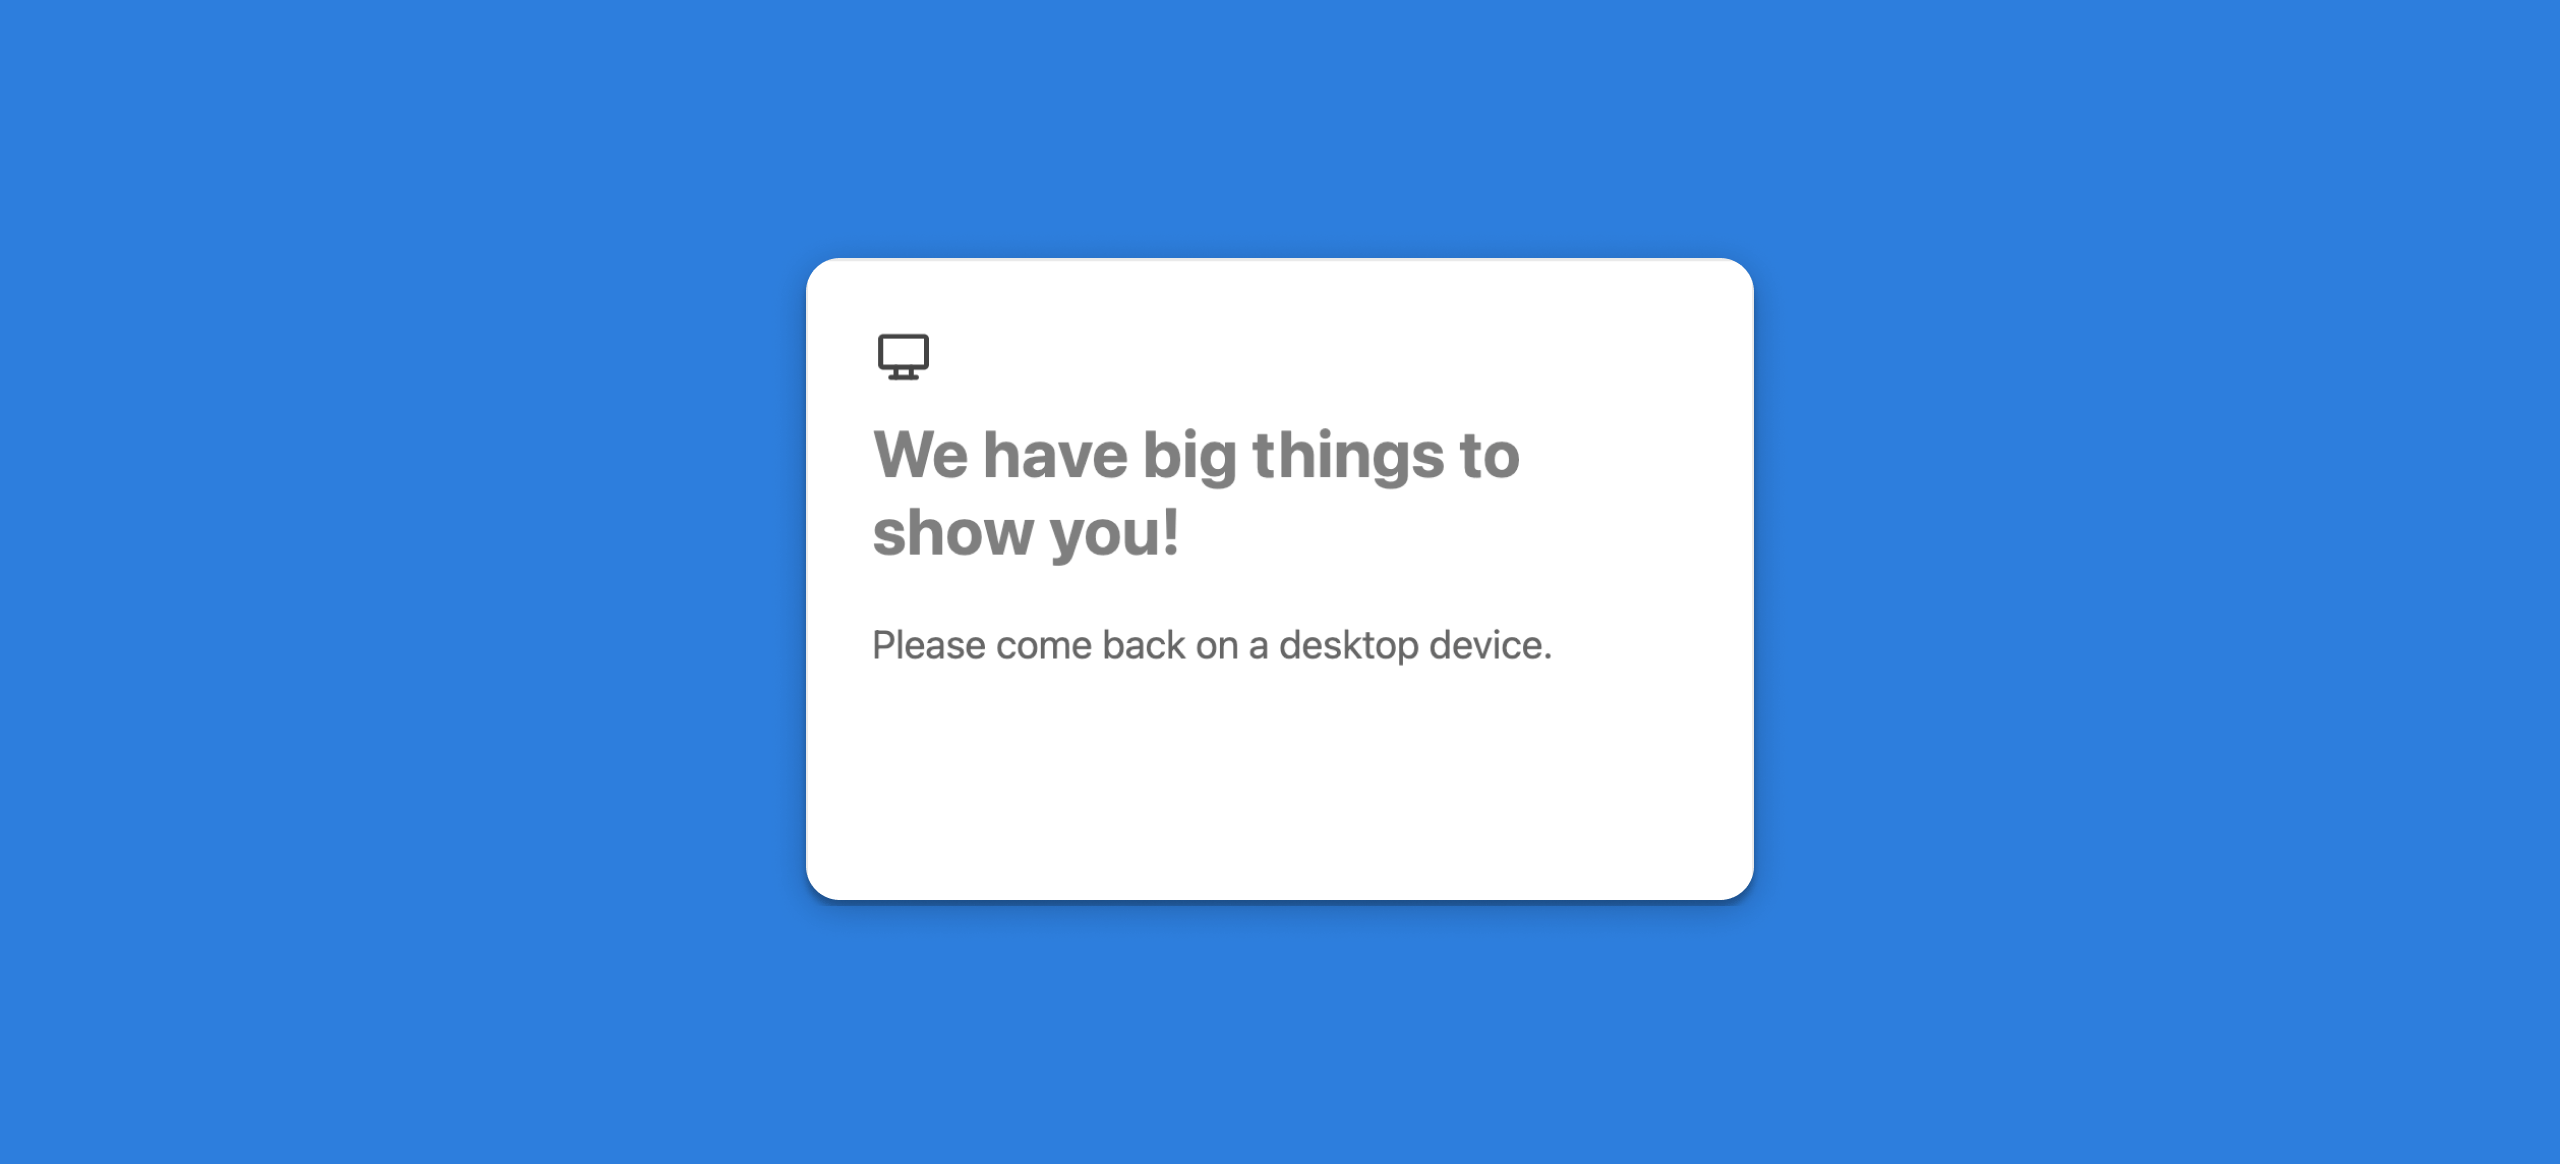
Teams can opt to turn this alert off to either scale the aspect ratio of the tour to fit the device or do nothing to enable viewing at the orginal capture dimensions.
Working with Webflow
Add a Navattic project to your custom landing page built on Webflow using the HTML Embed component.
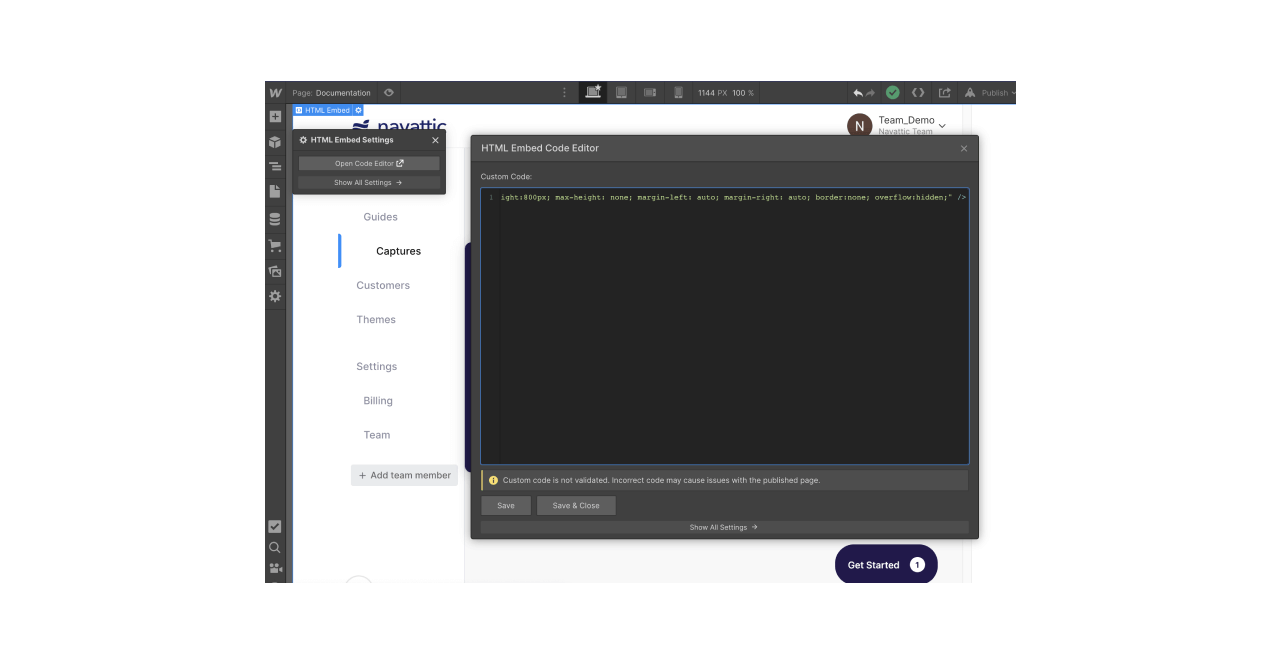
To add a fixed width iframe to your Webflow page, use the following snippet:
<iframe src="SOURCE_URL" style="position:auto; align:center; width:100%; height:100%; border:none; margin:auto;" />
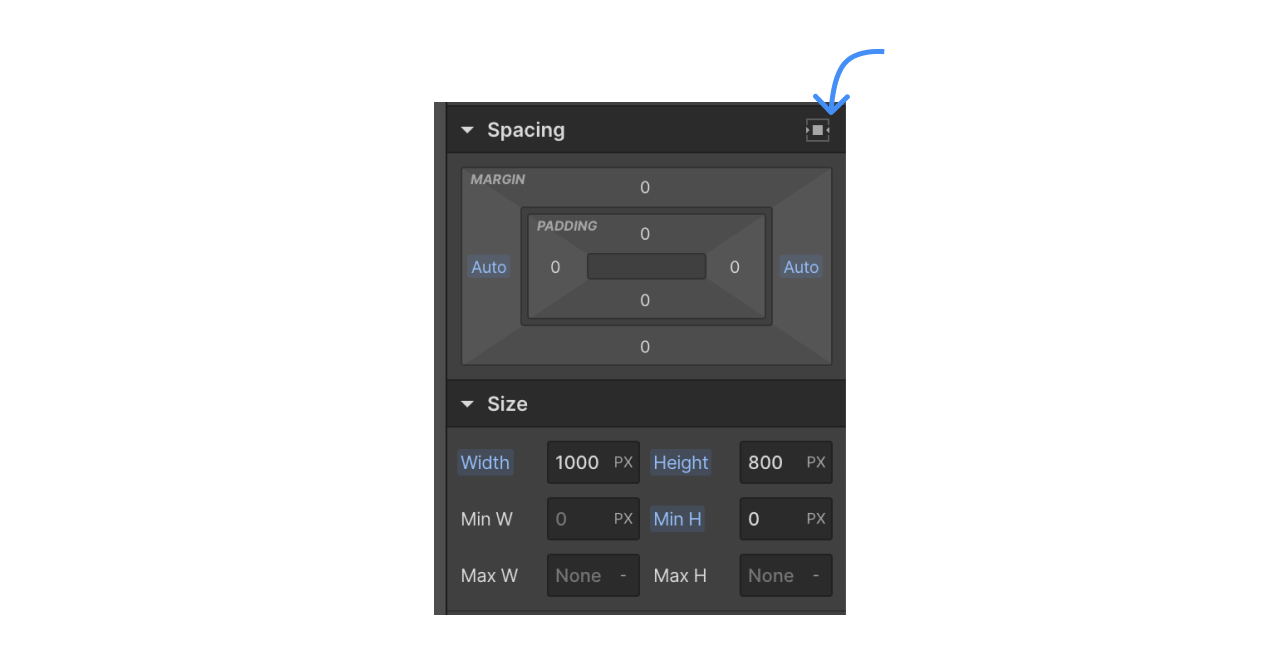
After adding in the snippet into the HTML embed editor, you can adjust size values using the Webflow size tool, add padding using the Webflow spacing tool, and center align the embed to appear in the middle of your webpage.
Working with Instapage
Add a Navattic project to your custom landing page built on Instapage using the HTML element.
To add a fixed width iframe to your Webflow page, use the following snippet:
<iframe src="SOURCE_URL" style="position:auto; align:center; width:100%; height:100%; border:none; margin:auto;" />
For more information, take a look at Instapage documentation.