Live Demo
Overview
Live Demo empowers sales teams to build an unbreakable, consistent, live demo environment that can be customized and reused. This lets sellers demo their software earlier in the sales process and reduces the time needed to close a deal.
Live Demo is a great fit for:
- Empowering non-technical sellers with a consistent demo environment
- Rapidly customizing demos for customers and partners
- Simplifying complex products with a pared down overview
How It Works
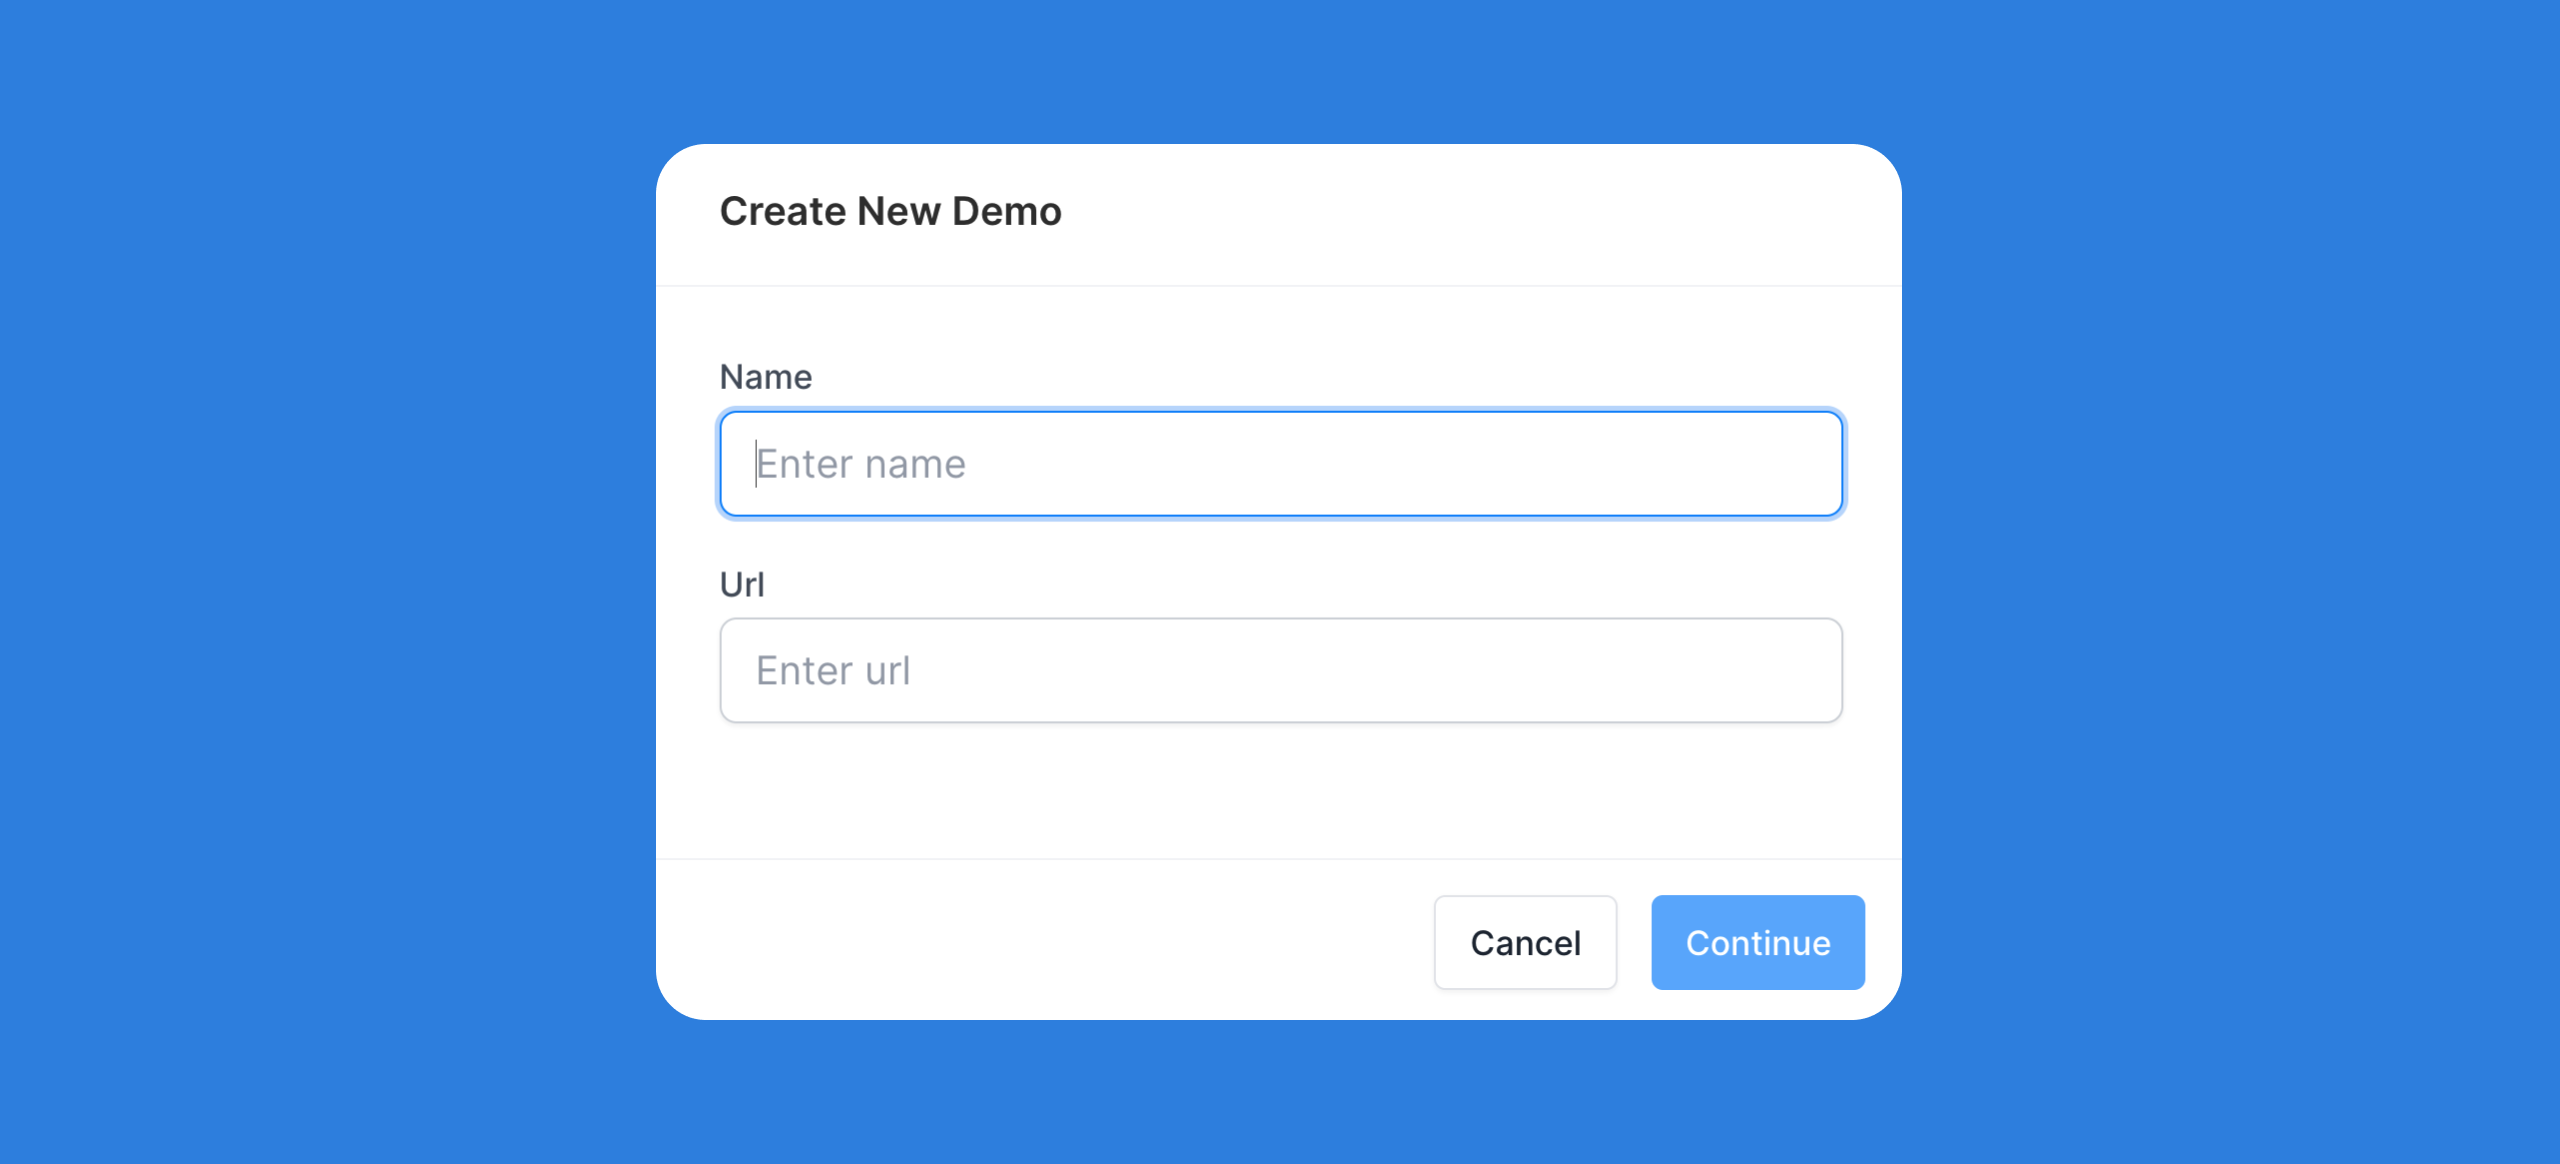
Similar to a Guided Demo, Live Demos are built using various Captures of your application. Enter a Name and App URL to begin taking Captures for your Demo.
You can also build a Demo directly from a Capture Collection by selecting Actions > “Create Demo”
Give each Capture a unique and searchable name when taking Captures. This will help identify link destinations in a later step.
Once you have taken Captures or Created a Demo, the Demo Builder will contain a large view of your Capture. We will refer to Captures as “Screens” when working within the Demo Builder.
Linking Screens
Start in the “Link” tab, where you can begin linking elements on one Screen to additional Screens. We will visit the “Navigate” tab later.
To link an element to a new screen, simply click any element in the Capture and follow the Link button that appears above it.
This opens a menu where you can select the link destination: This is the Screen that clicking this element will link to.
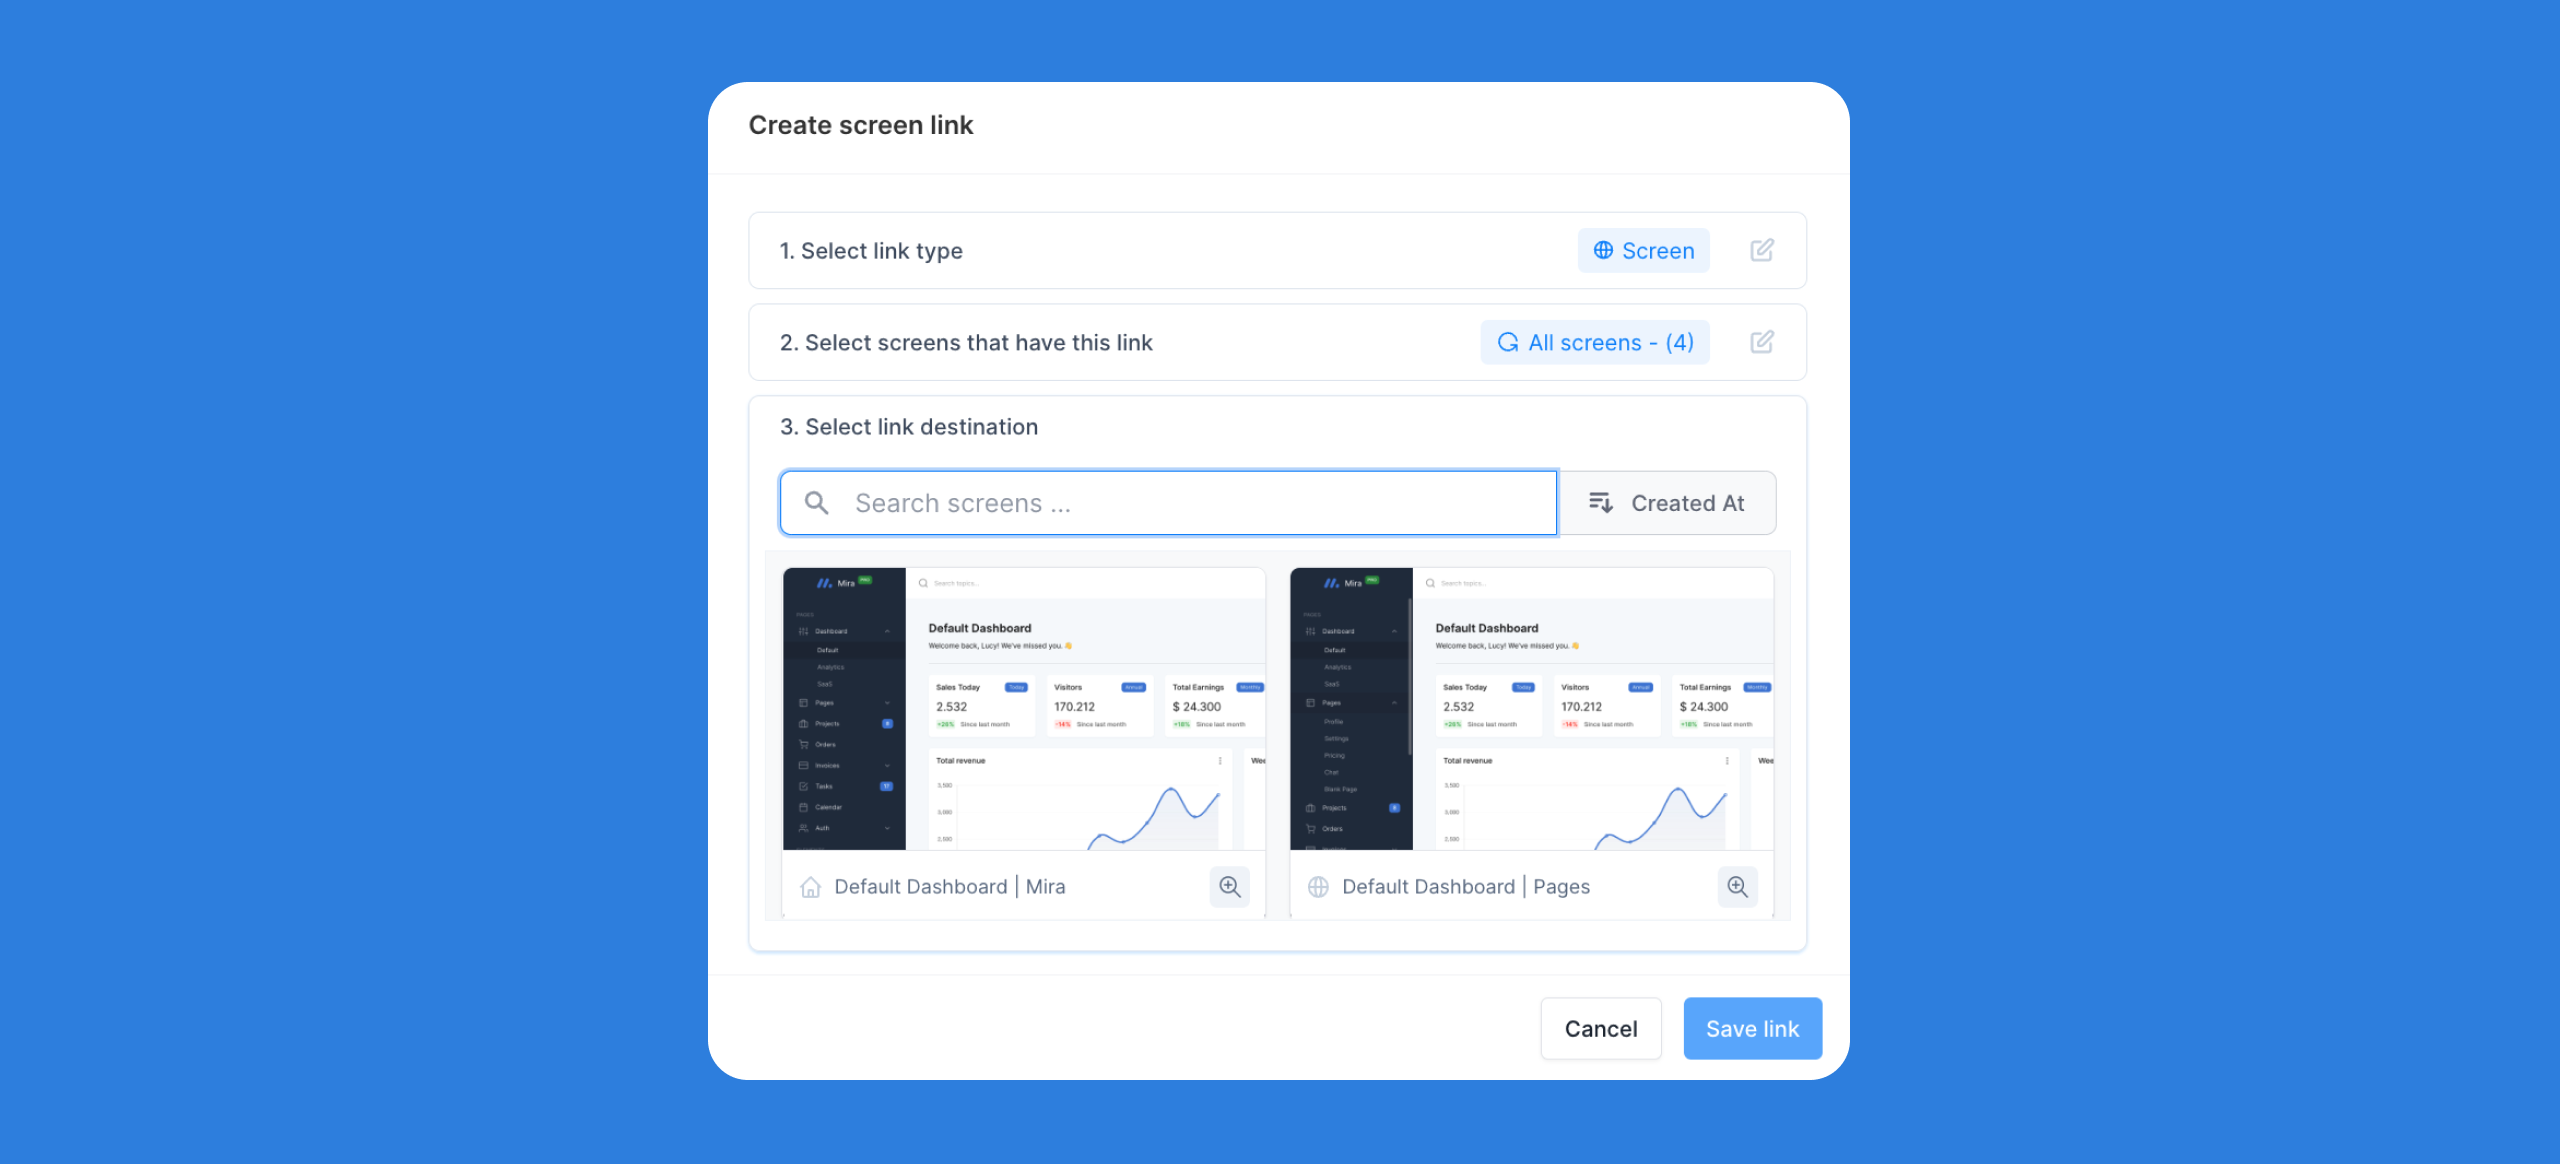
In this menu, you can also select the link type: A Screen will link to another Screen with interactive elements, while a URL will open a tab in a separate window.
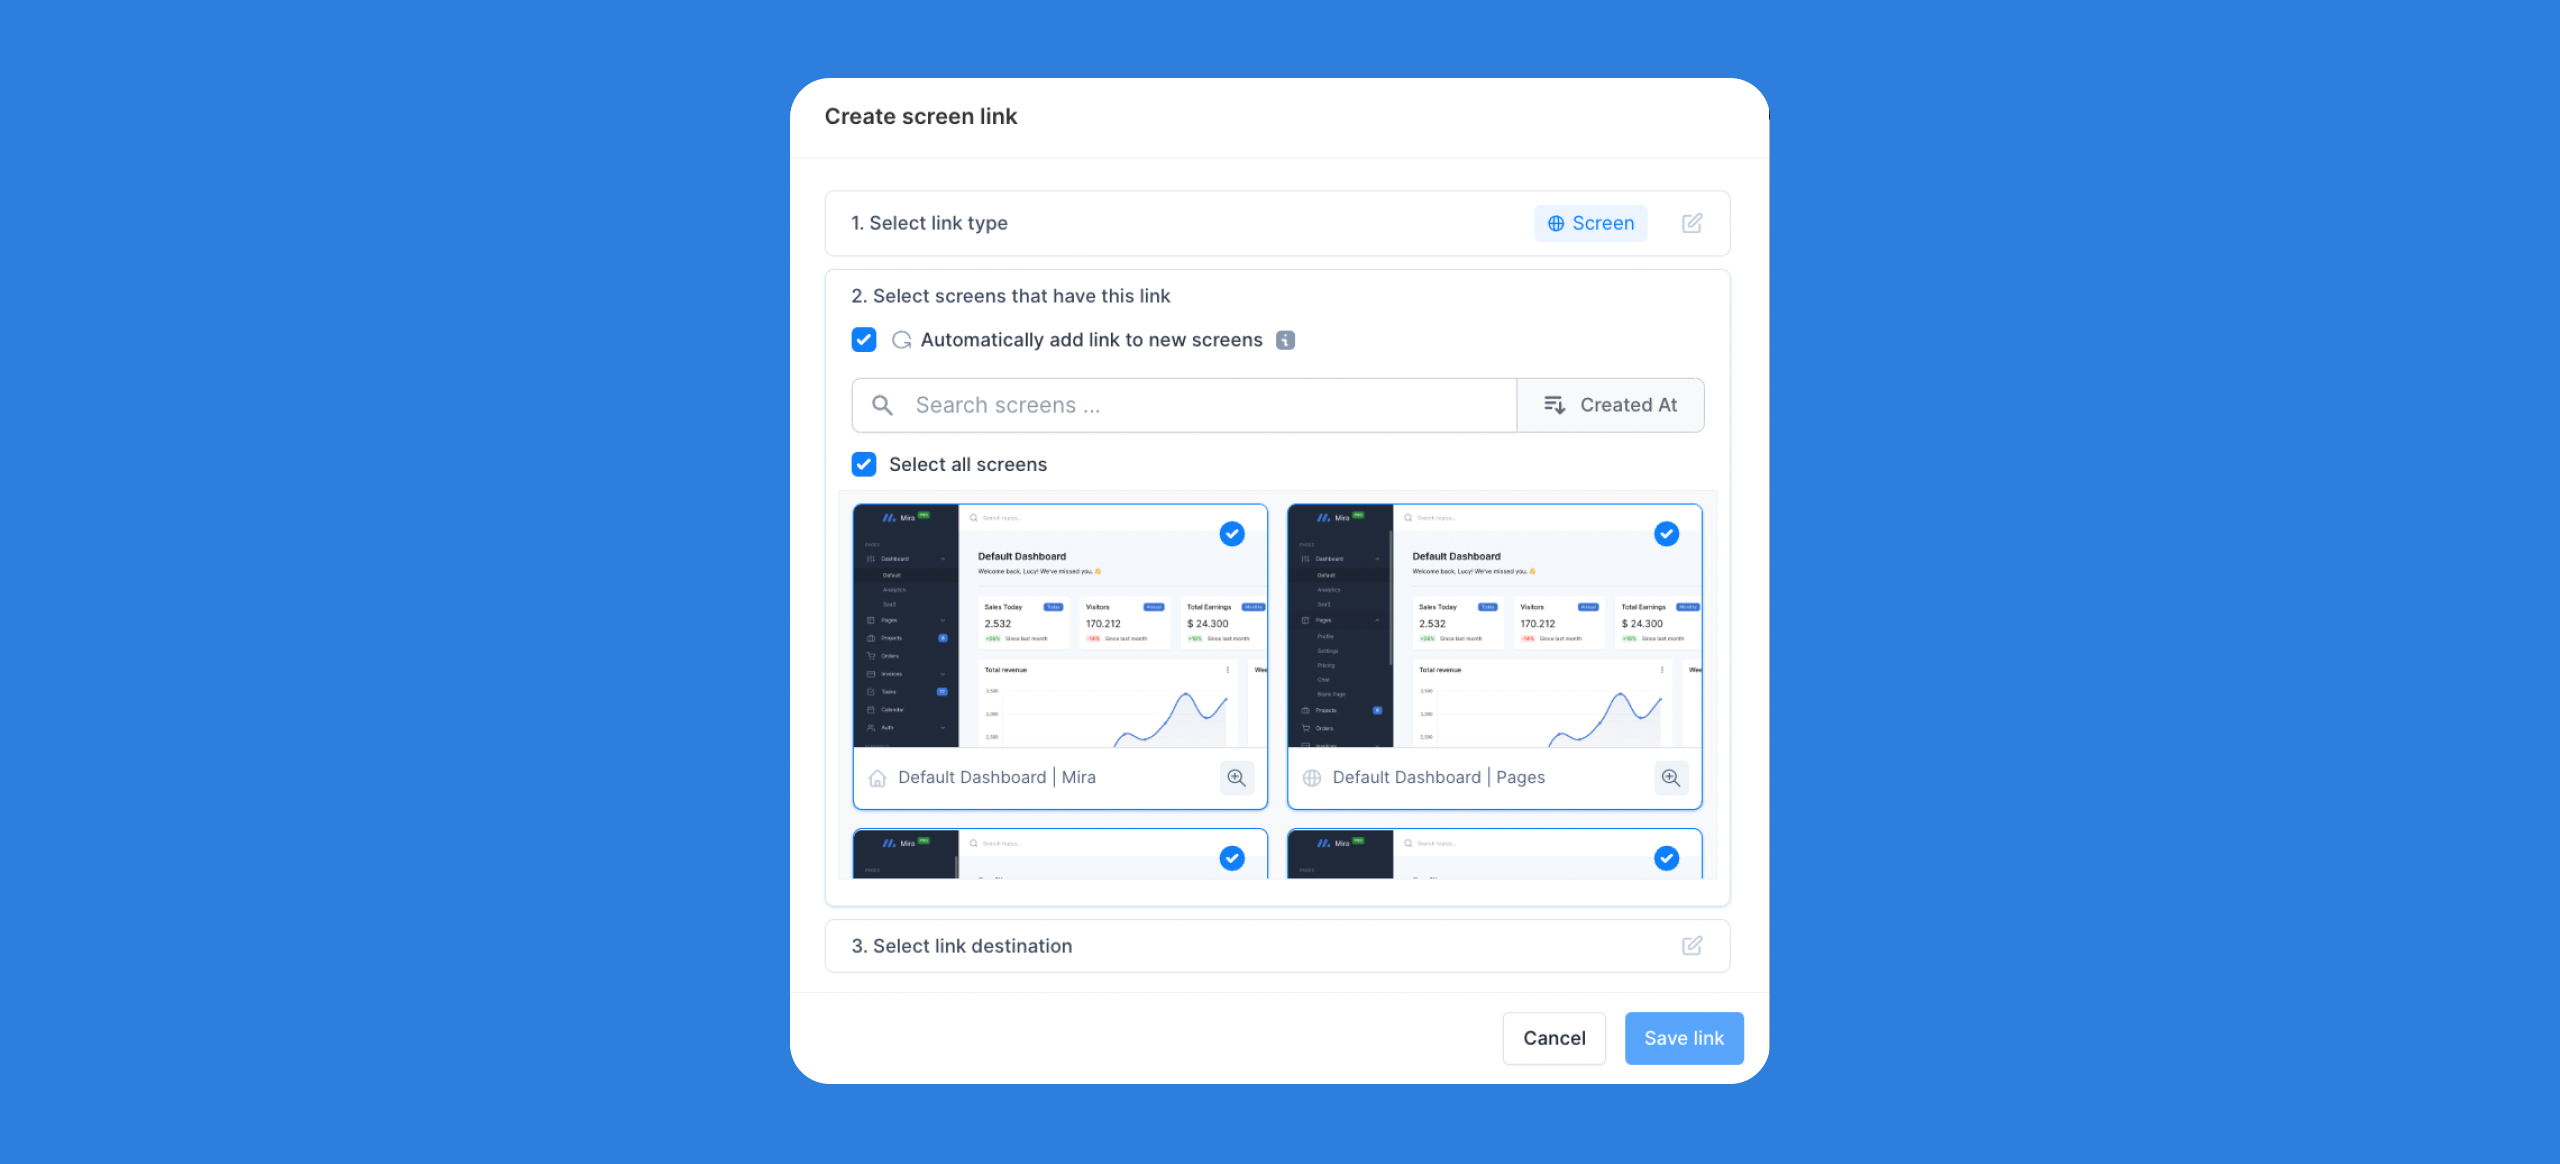
You can also select multiple screens that have this link: If an element appears consistently throughout your application (ex., a Home button), select “automatically add link to new screens” and “Select all screens” to save time while building.
Save and continue to link additional elements on this Screen.
Once all Links on the current Screen are saved, switch to the “Navigate” tab to select a new Screen from the Captures you have taken. Here, you can Rename, Duplicate, or Replace a Screen. You can also “Edit capture” to open the Navattic Capture Editor to make front-end adjustments to your Capture.

Switch back to “Link” tab to select and link elements. Click the Play button to preview your demo and Publish to apply your changes.
After your Demo is published, one or more users can Present from the Navattic workspace.